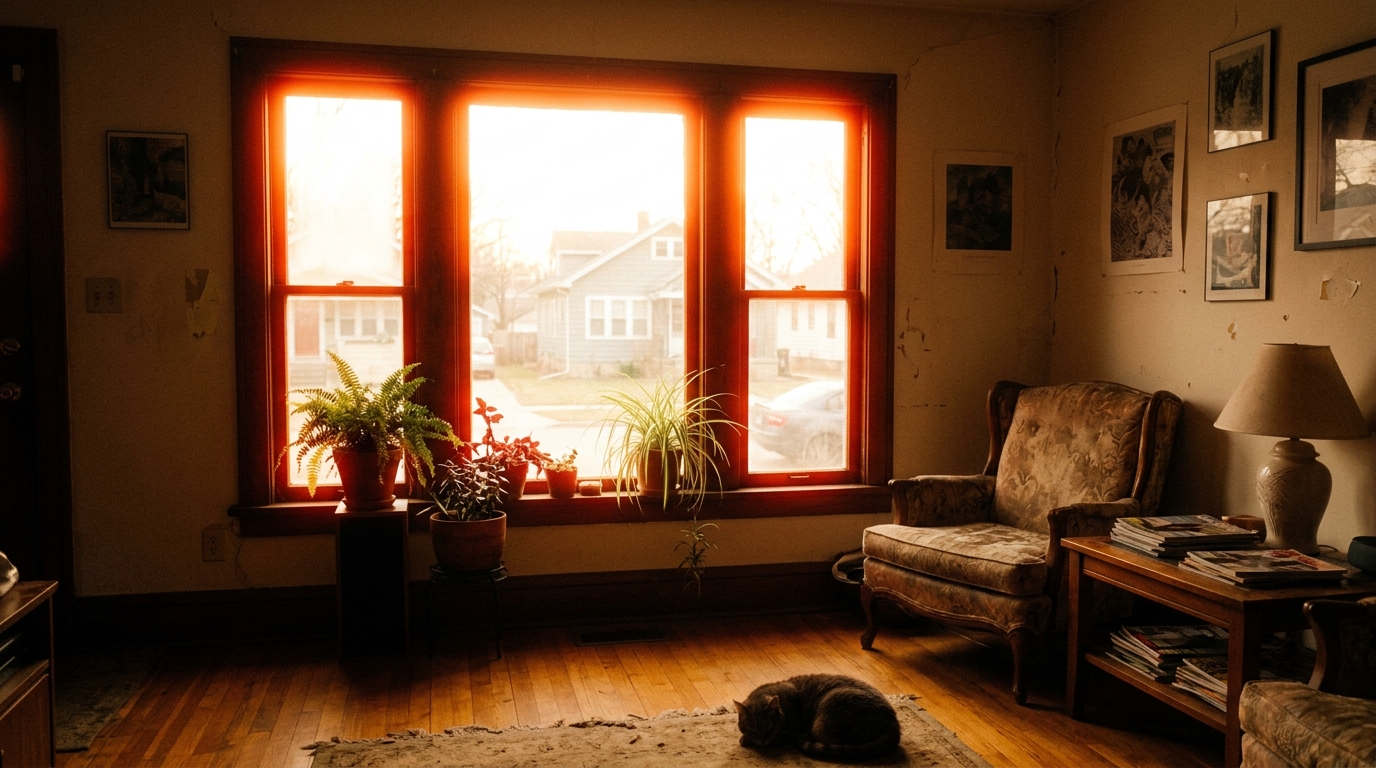
The halation effect is one of the most cinematic things you can do to a photo — and most people don’t know what it’s called. It’s that dreamy warm glow where bright light bleeds softly into the surrounding shadows: a window backlit against a dark room, a streetlamp at dusk blooming amber, the sun’s edge melting into the sky. You’ve seen it in films. You’ve seen it on album covers. You’ve scrolled past it on Instagram dozens of times without knowing its name.
That’s halation — and it’s become one of the most sought-after aesthetics in photography right now.
It’s also surprisingly hard to add convincingly. Get it wrong and your photo looks like someone smeared Vaseline on the lens. Get it right and ordinary photos feel like stills from a Terrence Malick film.
This guide covers exactly what the halation effect is, why it happens, how to recreate it manually in Lightroom — and why, for most people, an AI shortcut is faster, cheaper, and more convincing.
What Is the Halation Effect?
Halation is an optical phenomenon from film photography. When bright light exposes the film emulsion, it passes through the emulsion layer, reflects off the film base, and exposes the emulsion a second time from behind. The result: bright areas glow with a warm halo that bleeds into surrounding shadow regions.
The color of the halo depends on the film stock. On most negative films, it reads as a warm red-orange. On slide films, it tends toward a cooler amber. On black-and-white films, it can create a distinctive crimson bleed.
What Halation Looks Like in Practice
- Window light bleeds outward into the surrounding dark room with a warm glow
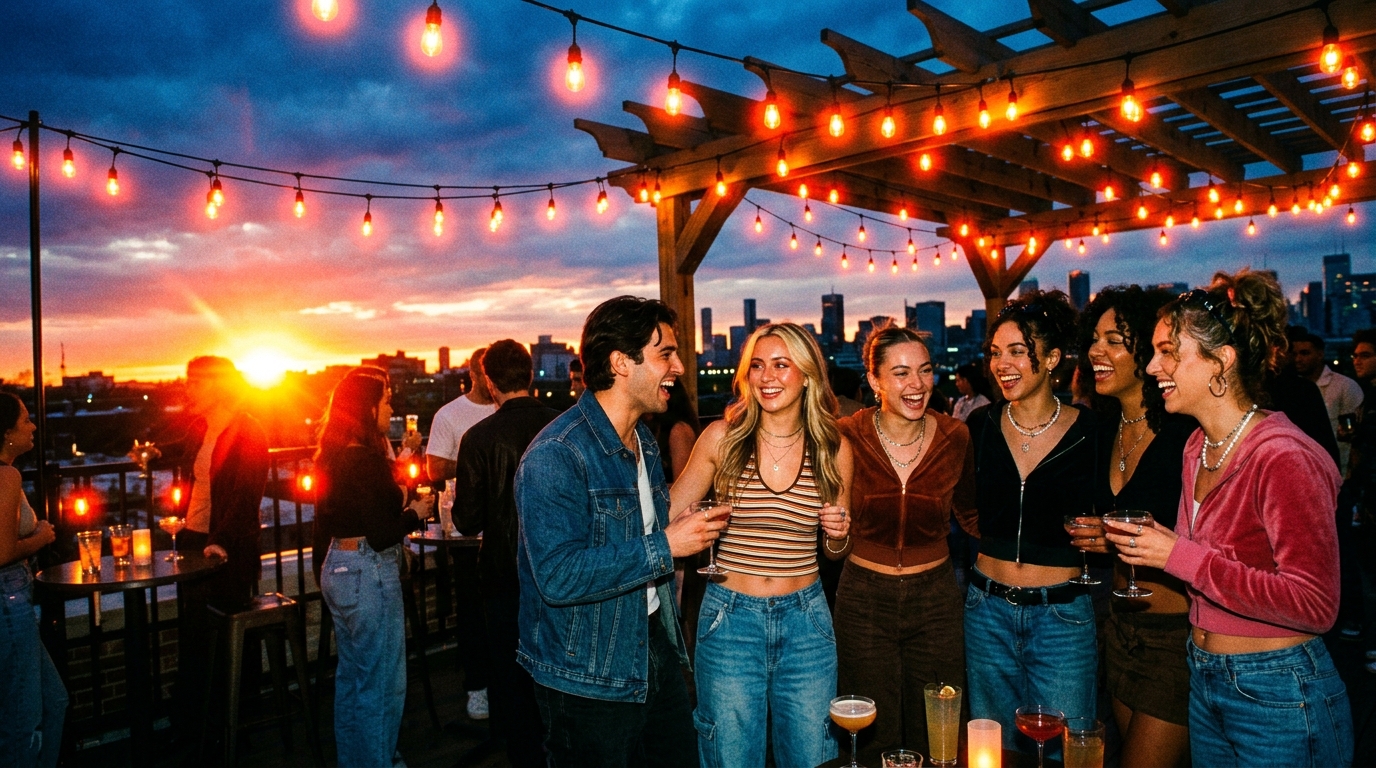
- Streetlamps at dusk bloom soft and amber rather than clipping to harsh white
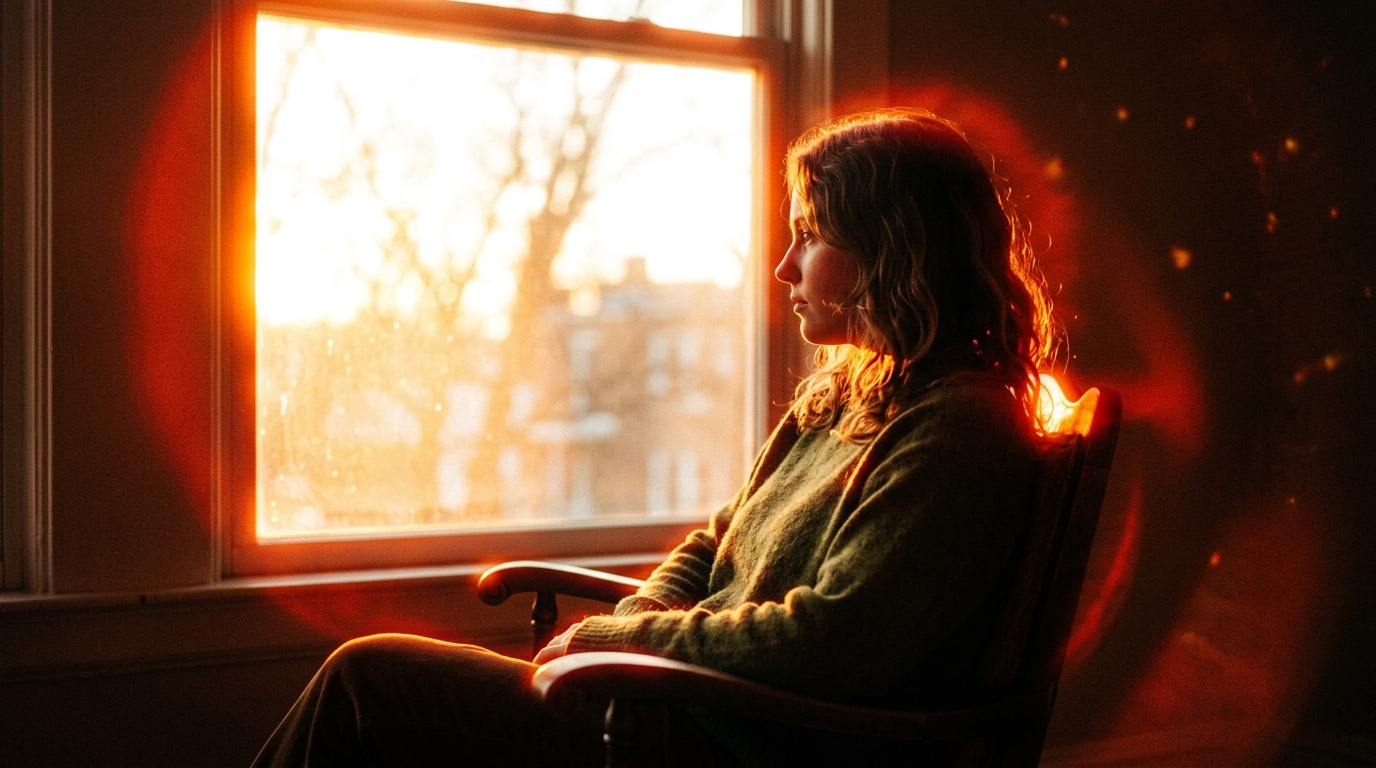
- Hair and rim-lit subjects glow at the edges, separating softly from the background
- The overall image feels warm, slightly dreamlike, and unmistakably analog
This is distinct from bloom (a digital overexposure artifact) or lens flare (a reflection inside the optical system). Halation is a film-specific phenomenon — which is exactly why it’s so sought-after now.
Why Halation Is Trending
Modern cameras have anti-aliasing filters, AI sharpening, and dynamic range so wide that highlights never clip and shadows never crush. Every photo is technically perfect. And technically perfect feels sterile.
Halation brings back imperfection in a controlled, beautiful way. It’s the same instinct driving the CCD camera aesthetic and the Y2K camera look — a hunger for the warmth and character that analog processes produced by accident.
Where You’ve Seen Halation (Without Knowing It)
Once you learn to spot halation, you’ll see it everywhere.
Cinema: Wong Kar-wai’s In the Mood for Love, Terrence Malick’s The Tree of Life, Sean Baker’s Tangerine — all use deliberate halation as a visual signature.
Music: Album artwork from indie, lo-fi, and alternative artists frequently uses halation to signal a warm, emotionally vulnerable aesthetic.
Fashion photography: Editorial shoots that want to feel intimate rather than high-fashion use halation to soften hard flash lighting into something more human.
Film photography revival: When photographers shoot on warm-toned stocks like Kodak Portra or CineStill 800T, halation appears naturally — and becomes part of the draw.
How to Add Halation in Lightroom: The Manual Method
If you use Lightroom and want full control, here’s how to do it. Fair warning: it takes time and practice to get it looking natural.
Method 1: Radial Filter + Glow
- Add a Radial Filter over your highlight area. Center it on the window, lamp, or bright region you want to glow. Feather it generously (80–100%).
- Adjust the settings inside the filter: Exposure +0.5 to +1.5; Highlights +30 to +60; Shadows +20 to +40 (lifts the glow into darker surrounding areas); Temp +20 to +40 with a slight magenta Tint (+5 to +15); Clarity -30 to -60 (softening is essential — sharp halation looks fake); Dehaze -20 to -40 (adds to the dreamy quality).
- Invert the radial filter so the adjustments apply outside the selected area — the glow bleeds outward, not inward.
- Repeat with 2–3 more radial filters at different sizes and opacities. Layering them builds a natural-looking multi-layer glow rather than a single obvious circle.
Method 2: Color Grading Panel (Subtler Approach)
For an image-wide halation feel rather than a localized effect:
- In the Color Grading panel → Highlights wheel, push toward warm amber (Red +10, Orange +8).
- Reduce Highlight Luminance to let the warm cast affect bright areas strongly.
- In the Shadows wheel, push slightly warm as well — real halation bleeds warmth into adjacent shadows.
- Adjust the Blending slider to control how broadly the warm tone spills from highlights into midtones.
The problem with manual Lightroom halation: it requires different settings for every photo because highlight positions, color temperatures, and compositions vary. Presets help but don’t adapt. Getting it consistently right across multiple photos can take hours.
AI Halation: The One-Click Alternative
AI tools trained on real film photography can add halation in a way that’s not just faster, but often more convincing — because the AI adapts to each photo’s specific highlight positions, color temperature, and composition.
Instead of placing radial filters manually, the AI identifies where highlights naturally occur in your image and applies warm, soft glow that bleeds realistically into surrounding areas.
Why AI Halation Looks More Authentic
It’s position-aware. The AI identifies real highlight sources (windows, lamps, backlit edges) and applies the glow where it would actually occur — not in a circle centered where you clicked.
It’s color-adaptive. The AI calibrates the warmth of the halation halo to the image’s existing color temperature. A cool-lit street scene gets a different halo warmth than a golden-hour portrait.
It handles edges naturally. The most convincing halation softly illuminates the edges of subjects against backlit backgrounds. AI does this automatically; doing it manually with Lightroom masking takes real skill.
How to Add Halation with PopCam
- Go to PopCam’s CCD camera effect tool — halation is a core element of the CCD aesthetic, alongside warm color science and fine grain.
- Upload your photo.
- Select the Film Bloom Warm or Warm Daylight CCD preset — both are built around authentic halation as a signature part of the look.
- Adjust the Glow and Warmth sliders to taste (subtle ambient glow → strong cinematic bloom).
- Download at full resolution — no watermarks, no compression.
Behind the Scenes: The Exact AI Prompts Behind These Photos
Every image in this article — the cozy 1990s living room above, the window-side portrait, and the rooftop party photo below — was generated with the PopCam AI image API using extreme CineStill 800T-style halation prompts. If you want to recreate this exact look on your own photos or generations, here are the prompts I used, word-for-word.
Notice the recurring keywords: CineStill 800T, massive red-orange halation halo, bleeding widely, exaggerated halation bloom. Modern image AIs respond strongly to film-stock names and explicit “bleed” language — those are the levers that crank halation from subtle to cinematic.
Featured image — backlit window living room
Prompt:
CineStill 800T extreme halation effect, dramatic warm bleed: a sun-drenched 1990s cozy living room with a large backlit window glowing intensely warm at golden hour. Massive red-orange halation halo bleeding dramatically and widely from the bright window into the dim interior, intense warm amber bloom flaring outward around every highlight including window edges and reflections, dreamy thick amber haze filling the entire room, pastel houseplants and vintage furniture silhouetted against intense bright window glow, dramatic warm bleed deep into the shadows, heavy analog film grain, strongly lifted shadows with intense warm color cast, nostalgic cinematic mood, horizontal framing, exaggerated halation bloom.
Window-side portrait — strong halo bleed
Prompt:
CineStill 800T extreme halation effect, dramatic warm bleed: cinematic portrait of a young woman sitting by a large bright window during golden hour, massive warm red-orange halation halo bleeding dramatically and widely from the bright window into the dark room around her, intense warm amber rim light blooming around her hair shoulders and chair edges, visible warm halation flare around every highlight, dreamy thick window flare bleeding wide into the shadows, heavy analog film grain, strongly lifted shadows, dramatic warm halo bleed visible throughout the image, retro film aesthetic, horizontal landscape, exaggerated halation bloom.
Rooftop party — CCD + halation + grain
Prompt:
CineStill 800T extreme halation effect, dramatic warm bleed: fun retro Y2K-style photo of a stylish friend group laughing at a sunset rooftop party with warm string lights, every string light bulb blooming intensely with massive warm red-orange halation halo bleeding widely into the surrounding sky and shadows, the setting sun glowing with dramatic intense warm flare and exaggerated halation, rich warm CCD color science with vibrant oranges pinks and ambers, dramatic halation halo around every single highlight, heavy fine film grain texture, strongly lifted shadows, playful candid mood, slightly soft focus, 2000s analog point-and-shoot aesthetic, horizontal landscape composition, exaggerated halation bloom.
Tip: the words “CineStill 800T” and “exaggerated halation bloom” are the two highest-leverage tokens. Drop the film-stock name to soften the look; drop “exaggerated” if you want subtle. Keep both for full cinematic halo.
Lightroom vs AI: Side-by-Side
| Factor | Lightroom Manual | AI (PopCam) |
|---|---|---|
| Time per photo | 10–20 minutes | ~10 seconds |
| Consistency across photos | Inconsistent (manual adjustments) | Consistent (AI adapts each photo) |
| Naturalness | Depends on skill | High (position-aware) |
| Cost | Lightroom subscription ($10–55/mo) | Free to try |
| Learning curve | Steep | None |
| Control | Full manual | Sliders + presets |
| Best for | Photographers who want pixel-level control | Everyone who wants great results fast |
When to Use Halation (and When Not To)
Halation enhances some photos dramatically and looks forced on others.
Great Candidates
- Backlit portraits (the rim-light glow is stunning)
- Window-lit interior scenes (warm, intimate atmosphere)
- Street photography at dusk or night (streetlamps bloom beautifully)
- Concert photos with stage lighting
- Any scene with a strong light source against darker surroundings
Less Suitable
- Flat-lit studio photos (nothing to glow from)
- Bright midday outdoor shots (too uniformly lit)
- Photos where you want to preserve clinical sharpness
The best halation is halation you feel before you see it — a warmth and softness that draws you emotionally into the image without consciously registering the technique.
Combining Halation with Other Retro Aesthetics
Halation is one element of a larger retro-film toolkit. It pairs naturally with:
- CCD color science — warm, organic color rendering that complements the halation glow. See our guide on how to get the CCD camera look.
- Fine film grain — texture that makes images feel physically real rather than digitally processed.
- Lifted shadows — matching the limited dynamic range of film, so shadows don’t crush completely.
- Gentle highlight rolloff — instead of digital clipping, highlights ease off softly.
When these elements combine — warm color grading, soft halation on highlights, fine grain, lifted shadows — the result is a photo that feels genuinely filmic. Not like a filter. Like the real thing.
Frequently Asked Questions
What’s the difference between halation and lens flare?
Lens flare is caused by light reflecting between elements inside the lens — it creates streak artifacts and ghost shapes. Halation is caused by light reflecting off the film base and re-exposing the emulsion from behind — it creates a soft, warm glow that bleeds outward from highlights. Very different visual signatures.
Can I add halation in Photoshop instead of Lightroom?
Yes — using Gaussian blur layers in Screen or Add blending mode over your highlights with a warm color fill. It’s more controllable than Lightroom but even more time-consuming to do well.
Will halation look fake on digital photos?
If done well, no. The key is that the glow needs to be soft, warm, and source-accurate. Overly bright, cool, or geometrically perfect halation looks fake. AI tools tend to handle this better than manual methods because they adapt to each photo’s actual highlight positions and color temperature.
Does halation work on black-and-white photos?
Yes — black-and-white film had distinctive halation patterns too, often visible as a warm fringe on high-key backlit shots even after conversion. On digital B&W, a gentle luminous glow on highlights adds the same quality and character.
Is PopCam’s halation effect free?
Yes, you can try it free at pop-cam.com/y2k-camera. No account required to start.
Final Thoughts
Halation is one of the most beautiful artifacts of film photography — a happy accident of physics that gives images warmth, depth, and that indefinable cinematic quality.
Adding it manually in Lightroom gives you control, but costs time and demands skill. An AI tool gives you results that are fast, natural, and adaptive — often more convincing than what you’d achieve with hours of manual adjustments.
Start with the AI shortcut. Once you understand what good halation looks like in your photos, you’ll have the trained eye to take it further with manual tools if you want.
No Lightroom subscription. No manual masking. Just cinematic, filmic warmth — on your photos.
Leave a Reply