Category: Entertainment

  • Halation Effect: AI Shortcut vs Lightroom (2026 Guide)

    Halation Effect: AI Shortcut vs Lightroom (2026 Guide)

    The halation effect is one of the most cinematic things you can do to a photo — and most people don’t know what it’s called. It’s that dreamy warm glow where bright light bleeds softly into the surrounding shadows: a window backlit against a dark room, a streetlamp at dusk blooming amber, the sun’s edge melting into the sky. You’ve seen it in films. You’ve seen it on album covers. You’ve scrolled past it on Instagram dozens of times without knowing its name.

    That’s halation — and it’s become one of the most sought-after aesthetics in photography right now.

    It’s also surprisingly hard to add convincingly. Get it wrong and your photo looks like someone smeared Vaseline on the lens. Get it right and ordinary photos feel like stills from a Terrence Malick film.

    This guide covers exactly what the halation effect is, why it happens, how to recreate it manually in Lightroom — and why, for most people, an AI shortcut is faster, cheaper, and more convincing.

    What Is the Halation Effect?

    Halation is an optical phenomenon from film photography. When bright light exposes the film emulsion, it passes through the emulsion layer, reflects off the film base, and exposes the emulsion a second time from behind. The result: bright areas glow with a warm halo that bleeds into surrounding shadow regions.

    The color of the halo depends on the film stock. On most negative films, it reads as a warm red-orange. On slide films, it tends toward a cooler amber. On black-and-white films, it can create a distinctive crimson bleed.

    What Halation Looks Like in Practice

    • Window light bleeds outward into the surrounding dark room with a warm glow
    • Streetlamps at dusk bloom soft and amber rather than clipping to harsh white
    • Hair and rim-lit subjects glow at the edges, separating softly from the background
    • The overall image feels warm, slightly dreamlike, and unmistakably analog

    This is distinct from bloom (a digital overexposure artifact) or lens flare (a reflection inside the optical system). Halation is a film-specific phenomenon — which is exactly why it’s so sought-after now.

    Why Halation Is Trending

    Modern cameras have anti-aliasing filters, AI sharpening, and dynamic range so wide that highlights never clip and shadows never crush. Every photo is technically perfect. And technically perfect feels sterile.

    Halation brings back imperfection in a controlled, beautiful way. It’s the same instinct driving the CCD camera aesthetic and the Y2K camera look — a hunger for the warmth and character that analog processes produced by accident.
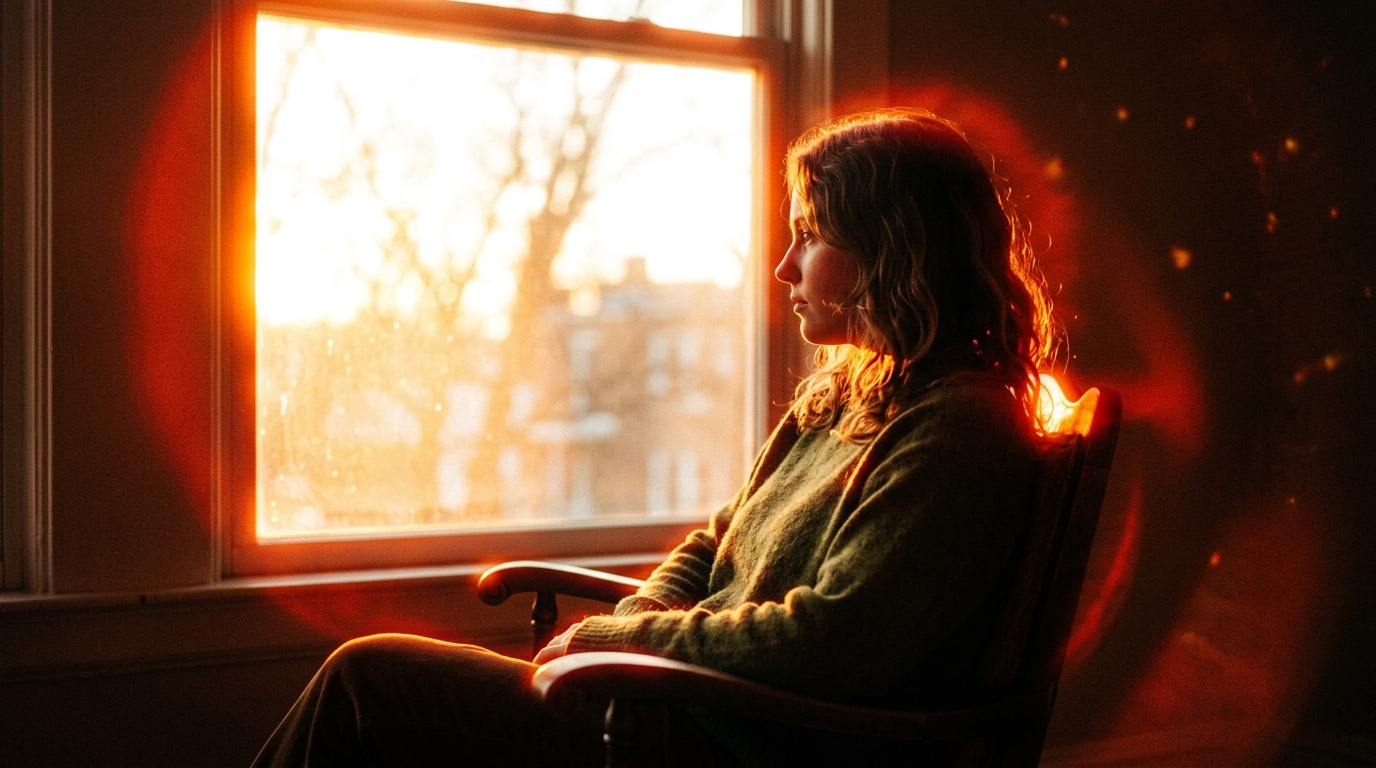
    Dramatic halation effect example: CineStill 800T-style red-orange halo bleeding widely from a backlit window around a young woman in a cinematic golden-hour portrait
    Halation in action: warm light from the window bleeds dramatically into the surrounding shadows — the textbook CineStill 800T look.

    Where You’ve Seen Halation (Without Knowing It)

    Once you learn to spot halation, you’ll see it everywhere.

    Cinema: Wong Kar-wai’s In the Mood for Love, Terrence Malick’s The Tree of Life, Sean Baker’s Tangerine — all use deliberate halation as a visual signature.

    Music: Album artwork from indie, lo-fi, and alternative artists frequently uses halation to signal a warm, emotionally vulnerable aesthetic.

    Fashion photography: Editorial shoots that want to feel intimate rather than high-fashion use halation to soften hard flash lighting into something more human.

    Film photography revival: When photographers shoot on warm-toned stocks like Kodak Portra or CineStill 800T, halation appears naturally — and becomes part of the draw.

    How to Add Halation in Lightroom: The Manual Method

    If you use Lightroom and want full control, here’s how to do it. Fair warning: it takes time and practice to get it looking natural.

    Method 1: Radial Filter + Glow

    1. Add a Radial Filter over your highlight area. Center it on the window, lamp, or bright region you want to glow. Feather it generously (80–100%).
    2. Adjust the settings inside the filter: Exposure +0.5 to +1.5; Highlights +30 to +60; Shadows +20 to +40 (lifts the glow into darker surrounding areas); Temp +20 to +40 with a slight magenta Tint (+5 to +15); Clarity -30 to -60 (softening is essential — sharp halation looks fake); Dehaze -20 to -40 (adds to the dreamy quality).
    3. Invert the radial filter so the adjustments apply outside the selected area — the glow bleeds outward, not inward.
    4. Repeat with 2–3 more radial filters at different sizes and opacities. Layering them builds a natural-looking multi-layer glow rather than a single obvious circle.

    Method 2: Color Grading Panel (Subtler Approach)

    For an image-wide halation feel rather than a localized effect:

    1. In the Color Grading panel → Highlights wheel, push toward warm amber (Red +10, Orange +8).
    2. Reduce Highlight Luminance to let the warm cast affect bright areas strongly.
    3. In the Shadows wheel, push slightly warm as well — real halation bleeds warmth into adjacent shadows.
    4. Adjust the Blending slider to control how broadly the warm tone spills from highlights into midtones.

    The problem with manual Lightroom halation: it requires different settings for every photo because highlight positions, color temperatures, and compositions vary. Presets help but don’t adapt. Getting it consistently right across multiple photos can take hours.

    AI Halation: The One-Click Alternative

    AI tools trained on real film photography can add halation in a way that’s not just faster, but often more convincing — because the AI adapts to each photo’s specific highlight positions, color temperature, and composition.

    Instead of placing radial filters manually, the AI identifies where highlights naturally occur in your image and applies warm, soft glow that bleeds realistically into surrounding areas.

    Why AI Halation Looks More Authentic

    It’s position-aware. The AI identifies real highlight sources (windows, lamps, backlit edges) and applies the glow where it would actually occur — not in a circle centered where you clicked.

    It’s color-adaptive. The AI calibrates the warmth of the halation halo to the image’s existing color temperature. A cool-lit street scene gets a different halo warmth than a golden-hour portrait.

    It handles edges naturally. The most convincing halation softly illuminates the edges of subjects against backlit backgrounds. AI does this automatically; doing it manually with Lightroom masking takes real skill.

    How to Add Halation with PopCam

    1. Go to PopCam’s CCD camera effect tool — halation is a core element of the CCD aesthetic, alongside warm color science and fine grain.
    2. Upload your photo.
    3. Select the Film Bloom Warm or Warm Daylight CCD preset — both are built around authentic halation as a signature part of the look.
    4. Adjust the Glow and Warmth sliders to taste (subtle ambient glow → strong cinematic bloom).
    5. Download at full resolution — no watermarks, no compression.

    Behind the Scenes: The Exact AI Prompts Behind These Photos

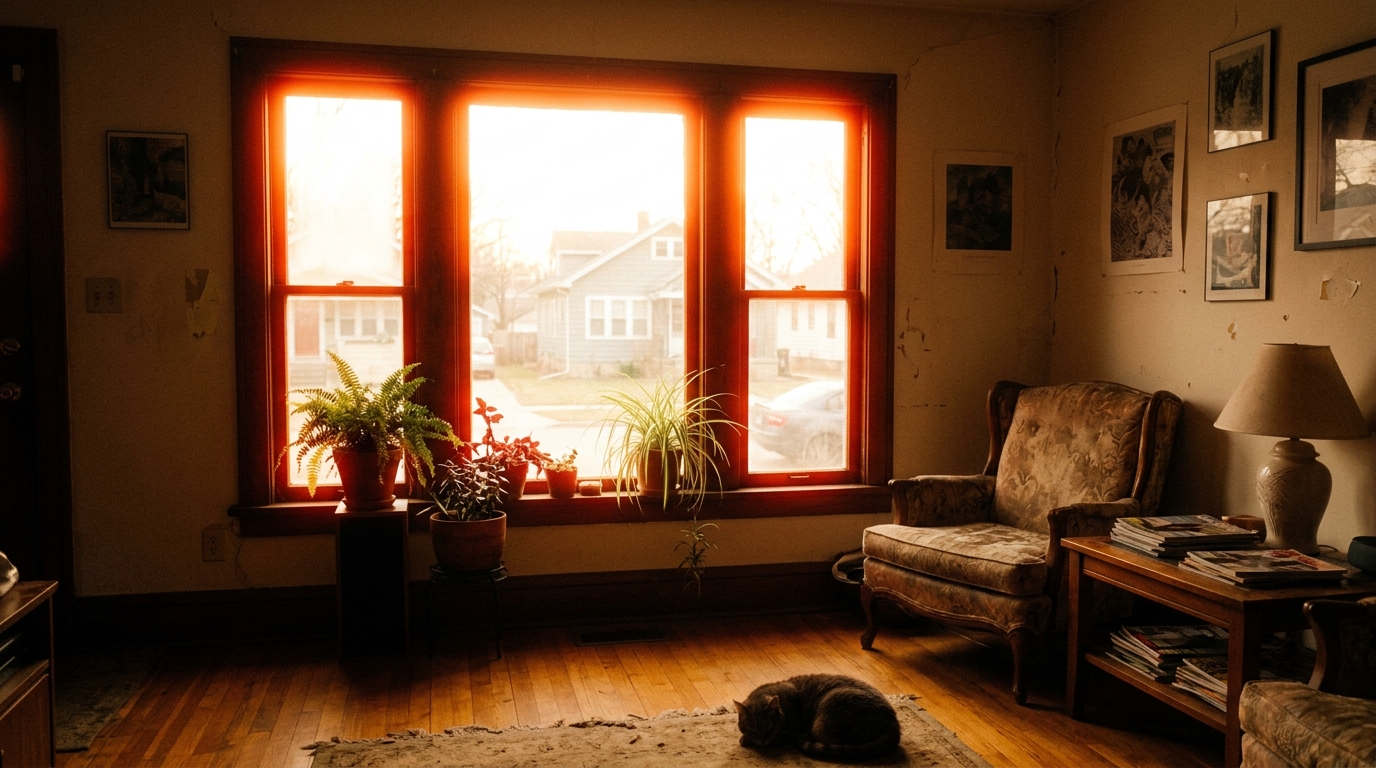
    Every image in this article — the cozy 1990s living room above, the window-side portrait, and the rooftop party photo below — was generated with the PopCam AI image API using extreme CineStill 800T-style halation prompts. If you want to recreate this exact look on your own photos or generations, here are the prompts I used, word-for-word.

    Notice the recurring keywords: CineStill 800T, massive red-orange halation halo, bleeding widely, exaggerated halation bloom. Modern image AIs respond strongly to film-stock names and explicit “bleed” language — those are the levers that crank halation from subtle to cinematic.

    Featured image — backlit window living room

    Prompt:

    CineStill 800T extreme halation effect, dramatic warm bleed: a sun-drenched 1990s cozy living room with a large backlit window glowing intensely warm at golden hour. Massive red-orange halation halo bleeding dramatically and widely from the bright window into the dim interior, intense warm amber bloom flaring outward around every highlight including window edges and reflections, dreamy thick amber haze filling the entire room, pastel houseplants and vintage furniture silhouetted against intense bright window glow, dramatic warm bleed deep into the shadows, heavy analog film grain, strongly lifted shadows with intense warm color cast, nostalgic cinematic mood, horizontal framing, exaggerated halation bloom.

    Window-side portrait — strong halo bleed

    Prompt:

    CineStill 800T extreme halation effect, dramatic warm bleed: cinematic portrait of a young woman sitting by a large bright window during golden hour, massive warm red-orange halation halo bleeding dramatically and widely from the bright window into the dark room around her, intense warm amber rim light blooming around her hair shoulders and chair edges, visible warm halation flare around every highlight, dreamy thick window flare bleeding wide into the shadows, heavy analog film grain, strongly lifted shadows, dramatic warm halo bleed visible throughout the image, retro film aesthetic, horizontal landscape, exaggerated halation bloom.

    Rooftop party — CCD + halation + grain

    Prompt:

    CineStill 800T extreme halation effect, dramatic warm bleed: fun retro Y2K-style photo of a stylish friend group laughing at a sunset rooftop party with warm string lights, every string light bulb blooming intensely with massive warm red-orange halation halo bleeding widely into the surrounding sky and shadows, the setting sun glowing with dramatic intense warm flare and exaggerated halation, rich warm CCD color science with vibrant oranges pinks and ambers, dramatic halation halo around every single highlight, heavy fine film grain texture, strongly lifted shadows, playful candid mood, slightly soft focus, 2000s analog point-and-shoot aesthetic, horizontal landscape composition, exaggerated halation bloom.

    Tip: the words “CineStill 800T” and “exaggerated halation bloom” are the two highest-leverage tokens. Drop the film-stock name to soften the look; drop “exaggerated” if you want subtle. Keep both for full cinematic halo.

    Lightroom vs AI: Side-by-Side

    FactorLightroom ManualAI (PopCam)
    Time per photo10–20 minutes~10 seconds
    Consistency across photosInconsistent (manual adjustments)Consistent (AI adapts each photo)
    NaturalnessDepends on skillHigh (position-aware)
    CostLightroom subscription ($10–55/mo)Free to try
    Learning curveSteepNone
    ControlFull manualSliders + presets
    Best forPhotographers who want pixel-level controlEveryone who wants great results fast

    When to Use Halation (and When Not To)

    Halation enhances some photos dramatically and looks forced on others.

    Great Candidates

    • Backlit portraits (the rim-light glow is stunning)
    • Window-lit interior scenes (warm, intimate atmosphere)
    • Street photography at dusk or night (streetlamps bloom beautifully)
    • Concert photos with stage lighting
    • Any scene with a strong light source against darker surroundings

    Less Suitable

    • Flat-lit studio photos (nothing to glow from)
    • Bright midday outdoor shots (too uniformly lit)
    • Photos where you want to preserve clinical sharpness

    The best halation is halation you feel before you see it — a warmth and softness that draws you emotionally into the image without consciously registering the technique.

    Combining Halation with Other Retro Aesthetics

    Halation is one element of a larger retro-film toolkit. It pairs naturally with:

    • CCD color science — warm, organic color rendering that complements the halation glow. See our guide on how to get the CCD camera look.
    • Fine film grain — texture that makes images feel physically real rather than digitally processed.
    • Lifted shadows — matching the limited dynamic range of film, so shadows don’t crush completely.
    • Gentle highlight rolloff — instead of digital clipping, highlights ease off softly.

    When these elements combine — warm color grading, soft halation on highlights, fine grain, lifted shadows — the result is a photo that feels genuinely filmic. Not like a filter. Like the real thing.
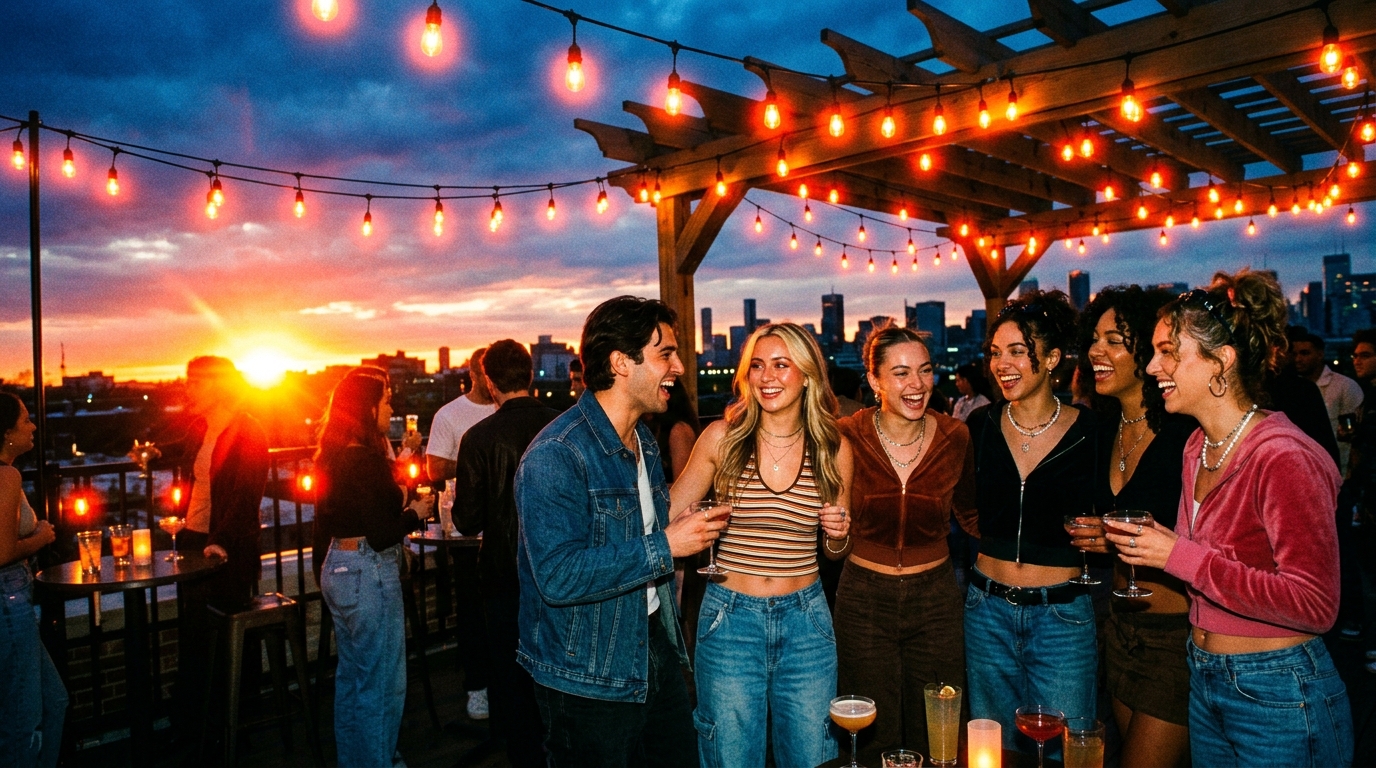
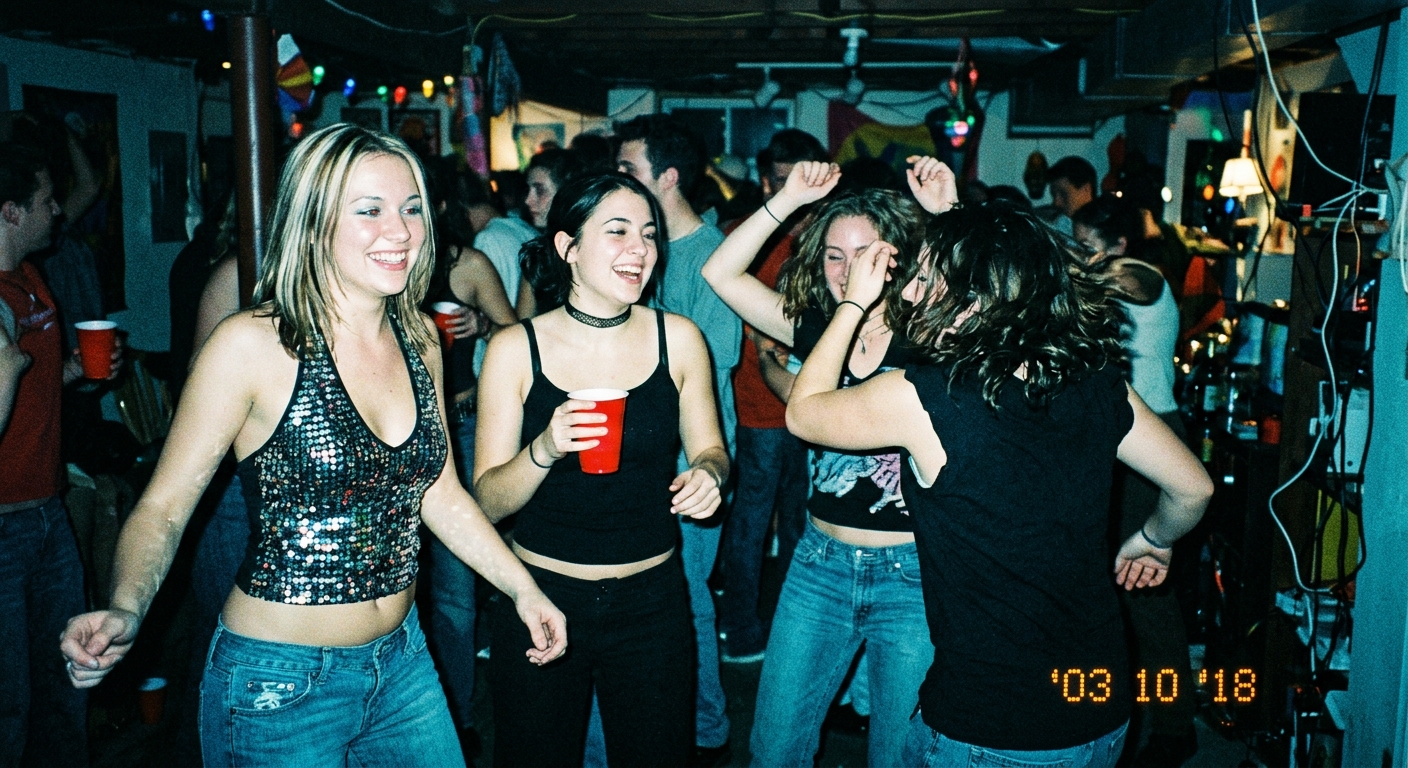
    CCD color science combined with strong halation and film grain on a sunset rooftop party with string lights — the complete analog-film aesthetic
    CCD color science + halation + film grain: the complete analog-film aesthetic, applied with AI.

    Frequently Asked Questions

    What’s the difference between halation and lens flare?

    Lens flare is caused by light reflecting between elements inside the lens — it creates streak artifacts and ghost shapes. Halation is caused by light reflecting off the film base and re-exposing the emulsion from behind — it creates a soft, warm glow that bleeds outward from highlights. Very different visual signatures.

    Can I add halation in Photoshop instead of Lightroom?

    Yes — using Gaussian blur layers in Screen or Add blending mode over your highlights with a warm color fill. It’s more controllable than Lightroom but even more time-consuming to do well.

    Will halation look fake on digital photos?

    If done well, no. The key is that the glow needs to be soft, warm, and source-accurate. Overly bright, cool, or geometrically perfect halation looks fake. AI tools tend to handle this better than manual methods because they adapt to each photo’s actual highlight positions and color temperature.

    Does halation work on black-and-white photos?

    Yes — black-and-white film had distinctive halation patterns too, often visible as a warm fringe on high-key backlit shots even after conversion. On digital B&W, a gentle luminous glow on highlights adds the same quality and character.

    Is PopCam’s halation effect free?

    Yes, you can try it free at pop-cam.com/y2k-camera. No account required to start.

    Final Thoughts

    Halation is one of the most beautiful artifacts of film photography — a happy accident of physics that gives images warmth, depth, and that indefinable cinematic quality.

    Adding it manually in Lightroom gives you control, but costs time and demands skill. An AI tool gives you results that are fast, natural, and adaptive — often more convincing than what you’d achieve with hours of manual adjustments.

    Start with the AI shortcut. Once you understand what good halation looks like in your photos, you’ll have the trained eye to take it further with manual tools if you want.

    No Lightroom subscription. No manual masking. Just cinematic, filmic warmth — on your photos.
    Related Reading

  • How to Get the CCD Camera Look Without Buying One (2026 Guide)

    How to Get the CCD Camera Look Without Buying One (2026 Guide)

    Spend five minutes on TikTok or Instagram and you’ll spot it: that warm, slightly dreamy photo quality that makes everything look like it was shot on an old Sony or Canon point-and-shoot. Skin tones glow. Highlights roll off softly. Colors feel organic, not engineered.

    That’s the CCD camera look — and it’s become one of the most sought-after aesthetics in photography right now.

    The problem? CCD cameras are vintage hardware. The sensors that produce this signature look were largely replaced by CMOS technology after 2010. Today, getting your hands on a working CCD camera means trawling eBay, paying $100–$300 for aging hardware, and hoping the thing actually works when it arrives.

    There’s a better way — and it takes about 10 seconds.

    What Is the CCD Camera Look, Exactly?

    Before we get to the shortcut, it’s worth understanding what makes the CCD aesthetic distinct.

    CCD stands for Charge-Coupled Device — a type of image sensor used in digital cameras throughout the 1990s and 2000s. Unlike modern CMOS sensors, CCD sensors processed light and color differently, which produced results that photographers today describe as “magical” or “filmic.”

    The Visual Fingerprints of a CCD Camera

    Warm, organic color rendering. CCD sensors reproduced color in a way that felt natural rather than mathematically accurate. Skin tones have a soft warmth. Blues are deep but not harsh. Greens feel lush, not oversaturated.

    Gentle highlight rolloff. Bright areas in a CCD photo don’t blow out aggressively — they roll off gradually, creating a gentle glow. This is one of the most distinctive qualities of the look.

    Subtle luminance noise. CCD noise is softer and more even than harsh digital noise — closer in feel to very fine film grain. It adds texture without looking like a mistake.

    Lower dynamic range, but beautiful. CCD sensors captured less dynamic range than modern sensors, which means shadows fall darker and highlights clip softer. The result is more dramatic and contrasty — in the best possible way.

    Natural depth and “pop.” CCD photos have a quality that’s hard to name but easy to feel: subjects pop from backgrounds with a naturalness that modern computational photography often overcorrects.

    This is why the CCD camera look is distinct from the Y2K camera aesthetic — which is flashier, cooler-toned, and grittier. CCD is warm and filmic; Y2K is harsh and electric. For a deeper dive into the differences, check out our guide on Y2K Camera vs CCD Camera.

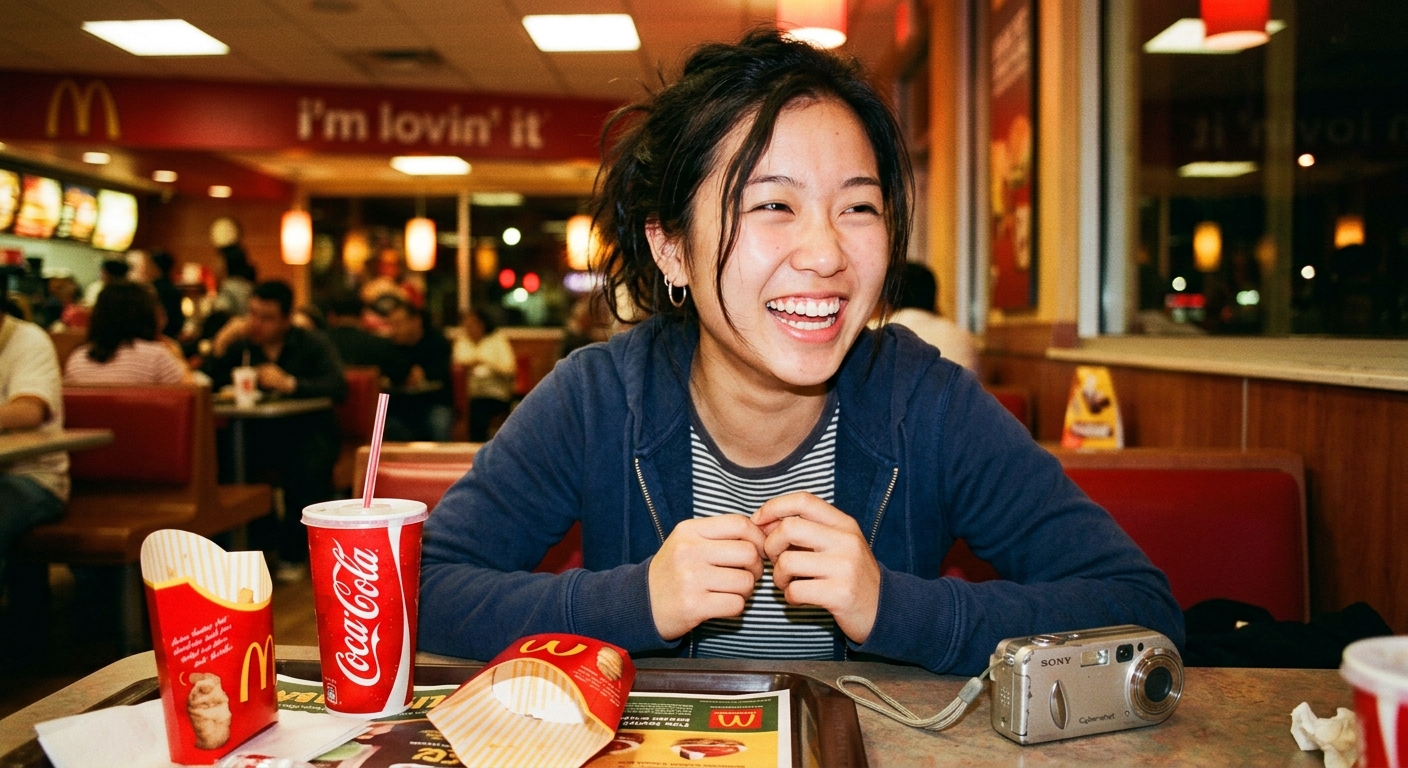
    Close-up of happy woman at McDonalds late night, warm CCD digicam aesthetic

    Late night McDonalds run — warm tones, soft grain, that cozy 4am energy

    Why CCD Cameras Are So Expensive (and Unreliable)

    The CCD camera resale market has exploded. Cameras that were $20 at a garage sale in 2018 now sell for $150–$400. Here’s why:

    • Supply is fixed. Nobody makes new CCD cameras. Every unit is aging hardware.
    • Demand is rising. Photographers and Gen Z content creators have discovered the look. Prices keep climbing.
    • Hardware is unreliable. Old sensors fail. LCD screens crack. Battery compartments corrode.

    Popular models driving the trend: Sony Cyber-shot DSC-T series, Canon Digital IXUS / PowerShot A series, Casio Exilim EX-Z series, Samsung NV series, Nikon Coolpix S series.

    Even if you find one at a good price, you’re stuck with proprietary cables, ancient memory cards (xD or Memory Stick), and constant anxiety about breakage.

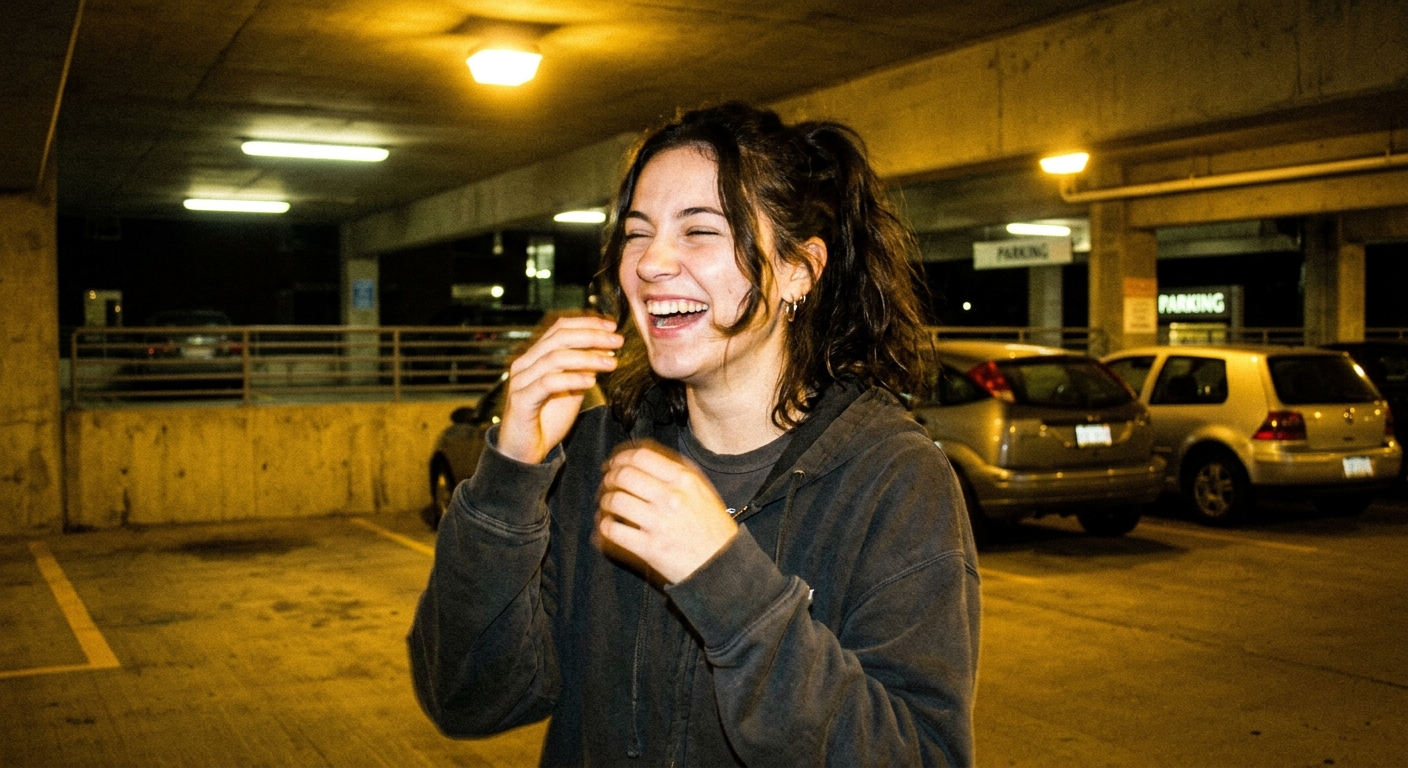
    Close-up of cheerful woman laughing in parking garage, warm CCD digicam photo

    Spontaneous parking garage moment — the CCD captures that candid joy perfectly

    Three Ways to Get the CCD Look (Ranked)

    Option 1: Buy a Vintage CCD Camera

    Pros: 100% authentic sensor behavior, collector value, the tactile joy of shooting on old hardware.

    Cons: $150–$400 on eBay. Risk of broken hardware. Outdated storage formats. Fixed 4–8MP resolution. No flexibility to re-edit.

    Verdict: Worth it if you’re a collector or photography purist. For everyone else — too expensive, too fragile, too limited.

    Option 2: Lightroom Presets

    Pros: Works on any photo, high-resolution output, lots of preset options.

    Cons: Getting the look right requires technical knowledge. Even great presets rarely nail the organic quality of real CCD color science. And quality preset packs cost $20–$80 each.

    Verdict: A reasonable middle ground for Lightroom users who want control. But there’s a ceiling on how close you can get to authentic CCD color with manual presets.

    Option 3: AI-Powered CCD Effect (Best)

    AI tools trained on real CCD camera output reproduce the color science, highlight rolloff, and noise characteristics with a level of authenticity that manual presets can’t match. The AI doesn’t approximate the look via sliders — it learns the underlying visual patterns from real CCD-shot images, then applies them to your photo.

    Pros: Instant results, full original resolution, no technical knowledge needed, fully customizable.

    Try it: PopCam’s CCD camera effect tool

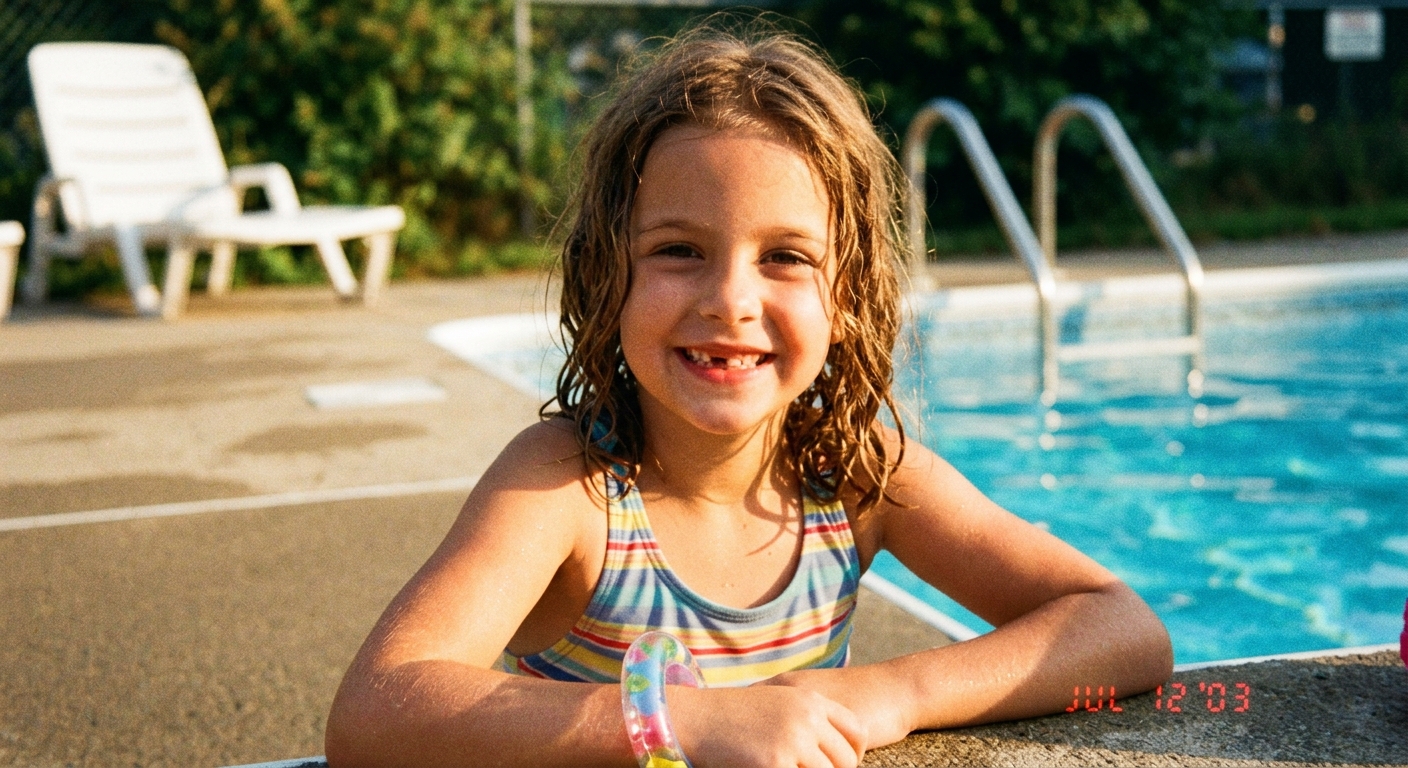
    Close-up of joyful girl by swimming pool, golden warm CCD digicam aesthetic

    Golden hour by the pool — that dreamy soft focus hits different on a CCD

    Step-by-Step: Get the CCD Look in Under a Minute

    Step 1: Pick Your Photo

    Almost any photo works, but the CCD look shines on portraits and candid shots, street photography, travel photos, and indoor shots under natural light.

    Pro tip: Photos taken in slightly challenging lighting — golden hour, overcast sky, indoor window light — benefit most. The gentle highlight rolloff handles these conditions beautifully.

    Step 2: Upload to PopCam

    Go to PopCam’s CCD camera effect tool. Drag and drop your photo, or tap to browse your camera roll.

    Step 3: Choose Your CCD Preset

    PopCam offers CCD presets tuned to distinct visual moods:

    • Warm Daylight CCD — the signature warmth of early-2000s point-and-shoots; soft skin tones, gentle highlights
    • Cool Classic Grain — slightly cooler and more contrasty, the look of early-2000s family snapshots
    • Street Neon Grain — higher contrast, more dramatic shadows, built for street and night photography
    • Film Bloom Warm — blends CCD color science with subtle film grain and a soft halation glow

    Step 4: Adjust (Optional)

    Fine-tune with controls for warmth, highlight rolloff, grain intensity, shadow depth, and color saturation.

    Step 5: Download

    Export at full original resolution. No watermarks, no compression.

    Close-up of happy woman in supermarket aisle, warm CCD digicam photo

    Late-night supermarket adventures — those warm tones make everything feel nostalgic

    CCD Look vs. Other Retro Aesthetics

    It’s easy to confuse the CCD aesthetic with similar vintage looks. Here’s how they differ:

    CCD Camera: Warm, organic color tone | Soft or no flash | Fine, luminous grain | Filmic, intimate vibe

    Y2K Digital: Cool, blue-green tone | Harsh, blown out flash | Digital noise | Electric, gritty vibe — perfect for recreating that early 2000s party aesthetic. See our Y2K camera settings guide for the full breakdown.

    Film (35mm): Variable by stock | Optical flare | Heavy film grain | Analog, timeless vibe

    Disposable Camera: Warm-cool mix | Flat, harsh flash | Heavy grain | Casual, lo-fi vibe

    The CCD look occupies a sweet spot: more modern than film, warmer and softer than Y2K. It’s early digital photography at its most appealing — before everything got too sharp, too clean, too processed.

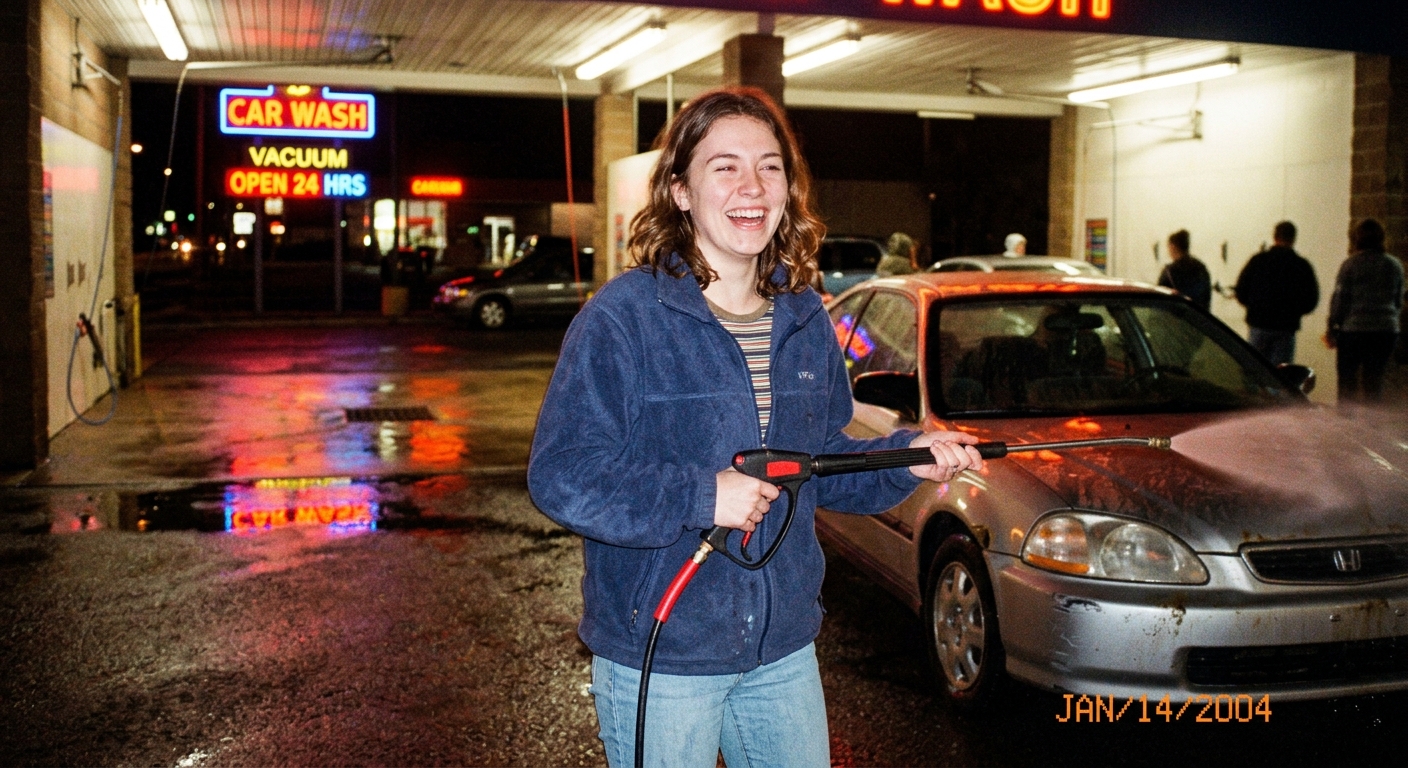
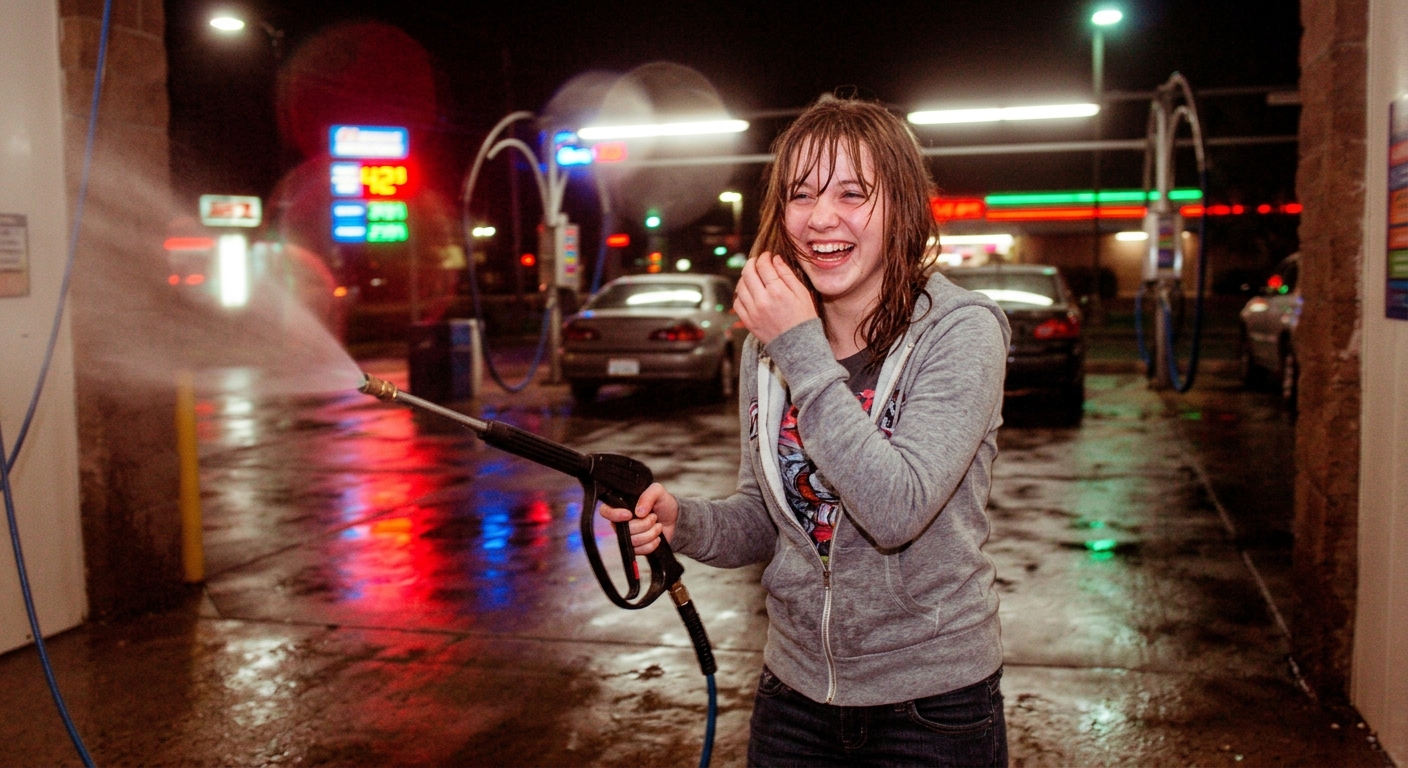
    Close-up of cheerful girl at car wash with neon reflections, warm CCD digicam aesthetic

    Midnight car wash — wet pavement, neon glow, and that carefree energy

    Who’s Using the CCD Look Right Now

    Content creators use it to give Instagram feeds a cohesive, nostalgic warmth that stands out against hyper-sharp smartphone content.

    Fashion brands shoot lookbooks with a CCD filter to signal authenticity — the opposite of the over-retouched catalog look.

    Musicians apply the CCD aesthetic to press photos and album artwork to evoke early-2000s indie energy.

    Everyday users transform iPhone photos of friends, food, and travel into something that feels like a found photograph — real, warm, lived-in.

    Frequently Asked Questions

    Is AI CCD as convincing as real hardware?

    For 95% of use cases, yes. The difference a purist might notice — the exact way a specific camera’s sensor handles chromatic aberration at the edges — isn’t visible on a social media post or phone screen. AI-generated CCD output is indistinguishable to the human eye at typical viewing sizes.

    Can I use my own photos from a smartphone?

    Absolutely. That’s the point. Upload any photo — iPhone, Samsung, DSLR — and the AI applies authentic CCD color science at full modern resolution.

    Do I need Lightroom or Photoshop?

    No. PopCam runs in your browser. No software to install, no subscription required.

    What resolution will my output be?

    Full resolution — whatever you uploaded. Real CCD cameras topped out at 4–8 megapixels. PopCam gives you the CCD aesthetic at your original image quality.

    Is PopCam free?

    Yes, you can try the CCD camera effect for free at pop-cam.com/ccd-camera-effect.

    Final Thoughts

    The CCD camera look is one of the most beautiful aesthetics in contemporary photography — warm, organic, and full of a quality that modern smartphone cameras have optimized away.

    You don’t need to spend $200 on aging hardware to get it. You don’t need to master Lightroom color grading to approximate it.

    You just need the right AI tool — one that understands what makes CCD output special and applies it to your photos in one click.

    No eBay anxiety. No broken cameras. Just that warm, filmic magic — right now.

    Related Reading

  • Best Y2K Camera Settings for That Nostalgic Vibe (2026)

    Best Y2K Camera Settings for That Nostalgic Vibe (2026)

    The Y2K camera aesthetic isn’t random. It’s not just a filter slapped on a modern photo.

    It’s the result of specific technical settings that early digital cameras (1998-2005) used — settings that created that distinct overblown flash, cool-toned, high-contrast look we now call “nostalgic.”

    If you want to recreate authentic Y2K vibes, you need to understand the settings behind the aesthetic.

    Whether you’re using a vintage digital camera, a modern AI tool, or a mobile app, the principles are the same: harsh flash, cool color temperature, high contrast, visible grain, and low resolution.

    Let’s break down the exact settings you need.

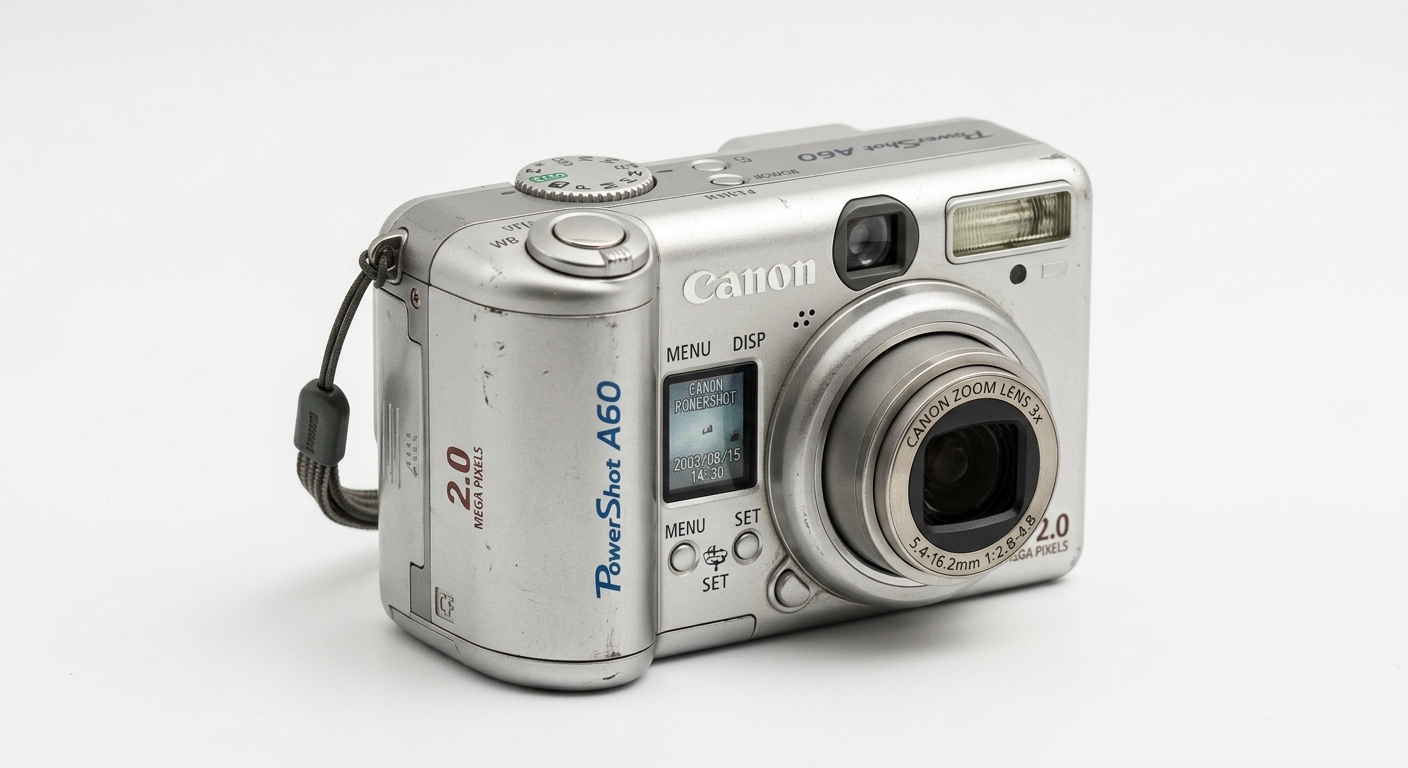
    Vintage Y2K digital camera Canon PowerShot from 2003

    Key Y2K Camera Settings (The 6 Essentials)

    Here are the core technical parameters that define the Y2K camera aesthetic:

    1. Flash: Overblown & Direct

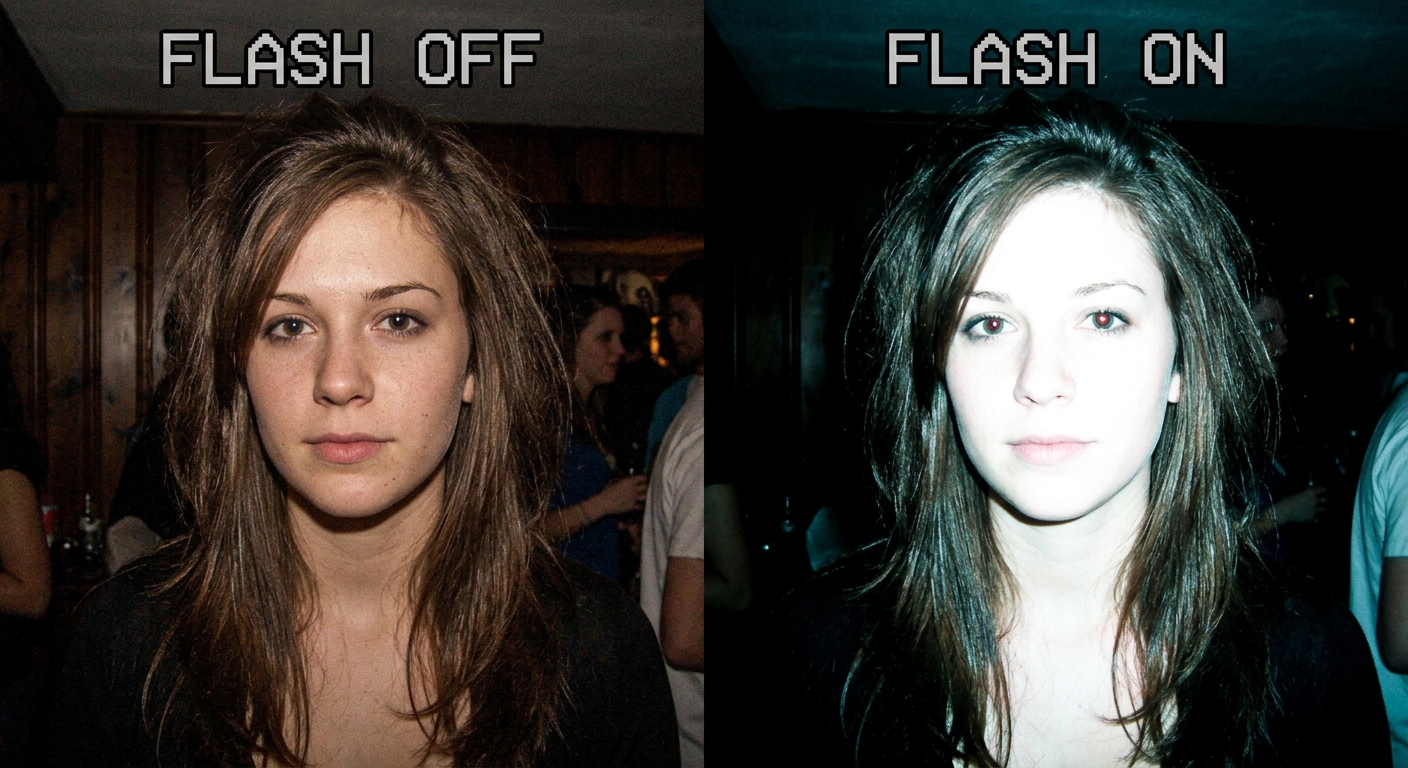
    Early digital cameras had weak, on-camera flashes that fired at full power. The result? Blown-out faces, dark backgrounds, harsh shadows.

    Y2K camera flash setting - overblown direct flash creating blown out highlights and dark backgrounds

    Setting:
    • Flash mode: Always ON (forced flash)
    • Flash power: 100% (no adjustment available on most Y2K cameras)
    • Flash distance: Close range (3-10 feet optimal)

    Why it matters: The overblown flash is the most recognizable Y2K trait. Without it, you just have a regular digital photo.

    2. ISO: Low (100-200)

    Y2K cameras had poor high-ISO performance. To avoid excessive noise, they defaulted to ISO 100-200 and compensated with flash.

    Y2K camera ISO 100-200 setting - clean highlights with visible grain in shadows

    Setting:
    • ISO: 100-200 (auto mode often locked here)
    • Result: Clean highlights, visible grain in shadows

    Why it matters: Low ISO + flash creates that signature Y2K contrast — glowing faces, noisy backgrounds.

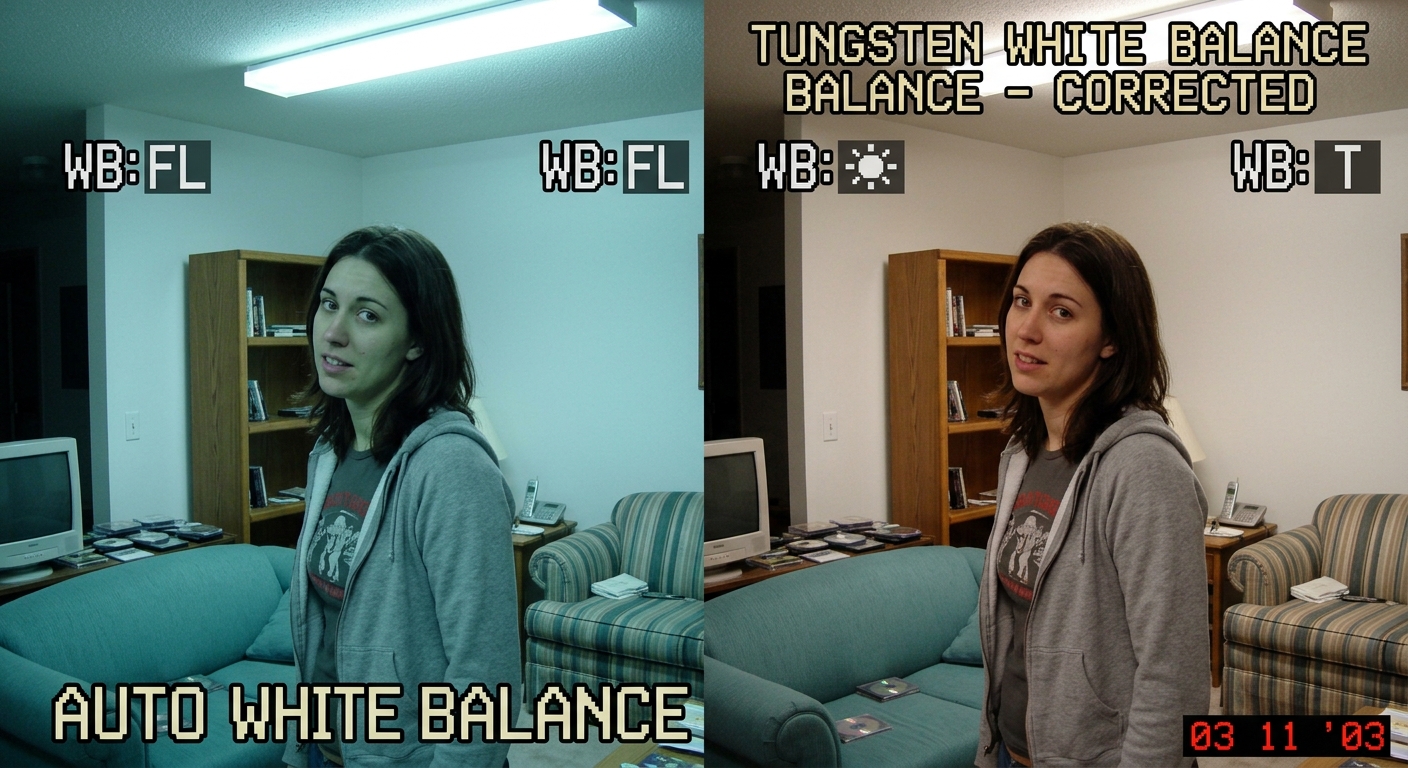
    3. White Balance: Cool (Auto or Fluorescent)

    Auto white balance on early cameras often skewed blue-green, especially under indoor fluorescent lighting.

    Y2K camera cool white balance setting - blue-green color cast from fluorescent lighting

    Setting:
    • White balance: Auto (tends cool) or Fluorescent preset
    • Color temperature: 5000K-6500K (cool, not warm)

    Why it matters: The cool blue-green tint separates Y2K from warmer CCD or film aesthetics. Learn more: Y2K vs CCD camera.

    4. Contrast: High

    To compensate for small sensors, manufacturers cranked up in-camera contrast processing.

    Y2K camera high contrast setting - deep blacks and bright whites with vivid picture mode

    Setting:
    • Contrast: +1 to +2 (or “Vivid” picture mode)
    • Result: Deep blacks, bright whites, minimal mid-tones

    Why it matters: High contrast = punchy, dramatic photos. It’s part of the Y2K “energy.”

    5. Saturation: High (Especially Reds & Blues)

    Y2K cameras boosted saturation to make colors “pop” — but it looked unnatural.

    Y2K camera high saturation setting - electric blues neon reds and oversaturated colors

    Setting:
    • Saturation: +1 to +2 (or “Vivid” mode)
    • Result: Electric blues, neon reds, oversaturated greens

    Why it matters: Natural colors = modern. Oversaturated colors = Y2K.

    6. Resolution: Low (3-5 Megapixels)

    Early digital cameras maxed out at 3-5MP. Images were soft, slightly pixelated, with blurred edges.

    Y2K camera low resolution 3-5 megapixel setting - soft focus with slightly pixelated edges

    Setting:
    • Resolution: 1600×1200 to 2560×1920 (3-5MP)
    • Result: Soft focus, no fine detail

    Why it matters: Modern high-res photos look too crisp. Y2K photos had a soft, “digital camera” quality.

    Step-by-Step: How to Apply Y2K Settings

    Option 1: Using a Vintage Digital Camera

    If you have a real Canon PowerShot, Sony Cyber-shot, or Nikon Coolpix:

    1. Turn on forced flash (disable auto/red-eye modes)
    2. Set ISO to 100-200 (or leave on Auto)
    3. Select “Vivid” or “Standard” picture mode (avoid “Portrait” or “Landscape”)
    4. Set white balance to Auto or Fluorescent
    5. Shoot in JPEG (not RAW — Y2K cameras didn’t have RAW)
    6. Get close (3-10 feet from subject for optimal flash coverage)

    Pros: 100% authentic hardware experience
    Cons: Expensive, fragile, low resolution, no editing flexibility

    Option 2: Using AI Tools (Recommended)

    Modern AI tools like PopCam let you simulate Y2K settings digitally:

    1. Upload your photo (any resolution, any device)
    2. Choose a Y2K preset (e.g., “Flashy Lavender Stars” or “Polka Dot Shoe Phone”)
    3. Adjust flash intensity (subtle → nuclear blast)
    4. Set color temperature (cool blue-green)
    5. Increase contrast & saturation
    6. Add visible grain (adjust noise level)
    7. Optional: Add date/time stamp (orange or white, bottom-right corner)
    8. Download in high resolution

    Pros: Full control, high-res output, no vintage gear needed
    Cons: Not “true” hardware (but 95%+ indistinguishable)

    Learn more: How to get the Y2K look without buying a camera

    Option 3: Using Mobile Apps

    Apps like Huji Cam, Dazz Cam, 1998 Cam:

    1. Open app and grant camera access
    2. Select Y2K or “Digital Camera” filter
    3. Shoot with flash enabled
    4. App auto-applies settings (limited customization)
    5. Export (often compressed or watermarked)

    Pros: Easy, quick
    Cons: Generic filters, low output quality, no fine-tuning

    Y2K Camera Settings for Different Scenarios

    Not all Y2K photos need the same settings. Here’s how to adjust based on lighting:

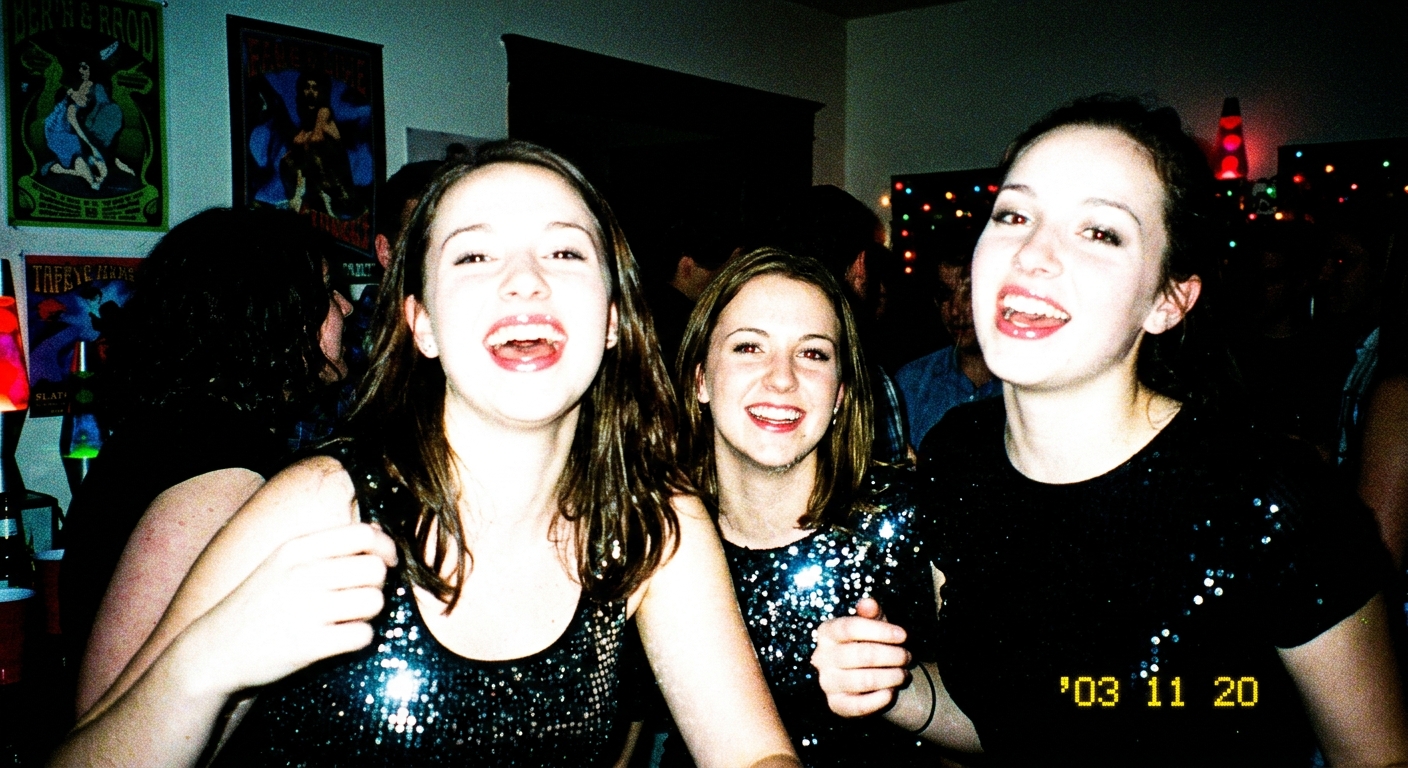
    Scenario 1: Party / Nightlife (Classic Y2K)

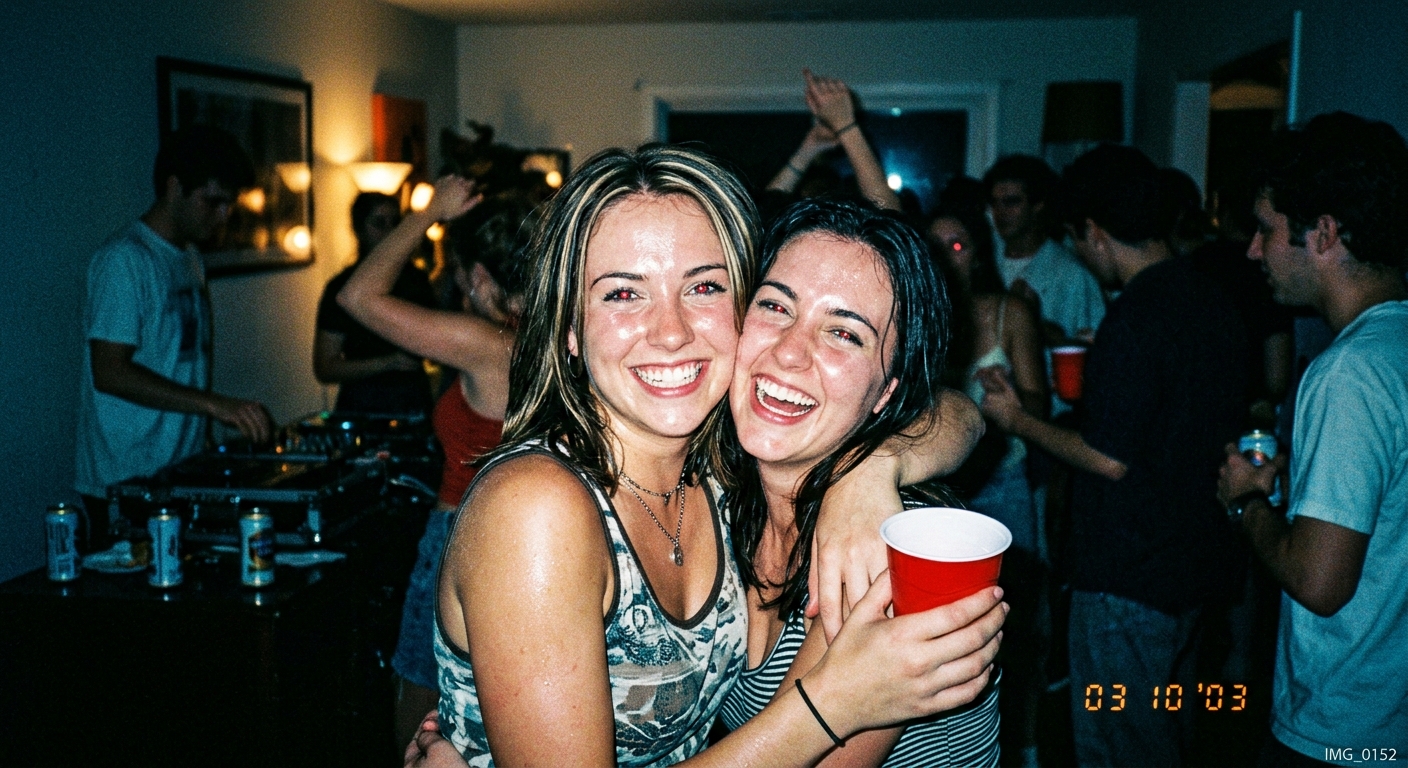
    Y2K party photo example with harsh flash and dark background

    Settings:

    • Flash: 100% (full blast)
    • ISO: 200-400
    • White Balance: Auto (cool)
    • Contrast: High (+2)
    • Saturation: High (+2)

    Result: Glowing faces, dark backgrounds, electric colors — the iconic Y2K party vibe.

    Scenario 2: Indoor / Fluorescent Lighting

    Settings:

    • Flash: 80% (medium)
    • ISO: 100-200
    • White Balance: Fluorescent (extra blue-green tint)
    • Contrast: Medium (+1)
    • Saturation: Medium (+1)

    Result: Cool-toned, slightly sterile look — common in Y2K indoor shots (malls, offices, schools).

    Scenario 3: Outdoor / Daylight

    Settings:

    • Flash: OFF or 30% (fill flash only)
    • ISO: 100
    • White Balance: Auto or Daylight
    • Contrast: High (+2)
    • Saturation: High (+2)

    Result: Bright, oversaturated colors, minimal shadows. Think early-2000s vacation photos.

    Scenario 4: Golden Hour (Hybrid Y2K/CCD Vibe)

    Settings:

    • Flash: OFF
    • ISO: 100-200
    • White Balance: Auto (slightly warm)
    • Contrast: Medium (+1)
    • Saturation: Medium (+1)

    Result: Less harsh than classic Y2K, warmer tones, closer to CCD aesthetic.

    Common Mistakes to Avoid

    1. Overdoing the Grain

    Y2K photos have visible grain in shadows, not thick film-like grain everywhere.

    Fix: Keep grain subtle in highlights, visible in dark areas only.

    2. Using Warm Color Temperature

    Y2K = cool blue-green tones. Warm yellow tones = CCD or film aesthetic.

    Fix: Shift white balance cooler (5500K-6500K).

    3. Soft Flash or No Flash

    Without harsh, overblown flash, it’s not Y2K — it’s just a digital photo.

    Fix: Crank flash intensity to maximum.

    4. Too High Resolution

    Modern 12MP+ photos look too sharp. Y2K cameras were 3-5MP max.

    Fix: Downscale to 1600×1200 or 2560×1920 for authentic softness.

    5. Wrong Date Stamp Placement

    Y2K cameras stamped dates in the bottom-right corner (or bottom-left), not center.

    Fix: Place timestamp in corner, orange or white font, small size.

    How to Fine-Tune Y2K Settings

    Once you have the base settings, here’s how to dial in the perfect vibe:

    Adjust Flash Intensity by Distance

    • Close-up (0-3 feet): Reduce flash to 70-80% (avoid total blowout)
    • Mid-range (3-10 feet): Use 100% flash (optimal Y2K range)
    • Far (10+ feet): Flash won’t reach — switch to CCD or film aesthetic

    Match Grain to ISO

    • ISO 100: Minimal grain, clean highlights
    • ISO 200: Slight grain in shadows
    • ISO 400+: Heavy grain (only if shooting indoors without flash)

    Test Different Presets

    If using AI tools like PopCam, try multiple Y2K presets:

    • “Flashy Lavender Stars”: Cool-toned, high flash, party energy
    • “Polka Dot Shoe Phone”: Warm flash, nostalgic texture
    • “Cat Print Digital Camera”: Soft grain, subtle timestamp
    • “Ocean Denim Corset”: Blue-green cast, classic Y2K color science

    Each preset mimics a different Y2K camera model.

    Real-World Y2K Settings Example

    Let’s say you’re recreating a 2003 house party photo:

    Camera settings (vintage camera):

    • Canon PowerShot S200
    • Flash: ON (forced)
    • ISO: 200
    • White Balance: Auto (fluorescent lighting → blue-green tint)
    • Picture Mode: Vivid
    • Resolution: 1600×1200 (2MP)

    AI tool settings (PopCam):

    • Preset: “Flashy Lavender Stars”
    • Flash intensity: 95%
    • Color temperature: 5800K (cool)
    • Contrast: +2
    • Saturation: +2
    • Grain: 30% (visible in shadows)
    • Date stamp: “2003:08:15 23:47” (orange, bottom-right)

    Result: Glowing faces, dark background, electric blue-green tint, punchy reds, visible grain — pure Y2K nostalgia.

    FAQs

    What’s the most important Y2K camera setting?

    Flash. Without overblown, harsh flash, you don’t have Y2K — you just have a regular digital photo. Flash is non-negotiable.

    Can I get Y2K vibes without flash?

    Technically yes, but it won’t be “classic Y2K.” You can use high contrast + cool tones + grain for a Y2K-adjacent look, but it’s closer to CCD aesthetic.

    What ISO should I use for Y2K photos?

    ISO 100-200 is ideal. Y2K cameras had poor high-ISO performance, so they stuck to low ISO and compensated with flash.

    Should I shoot in RAW or JPEG?

    JPEG. Y2K cameras didn’t support RAW. Shooting JPEG with in-camera processing (high contrast, high saturation) is more authentic.

    How do I add a date stamp like old cameras?

    Use AI tools like PopCam or mobile apps (Huji Cam, Dazz Cam). Position it in the bottom-right corner, use orange or white font, and keep it small.

    Final Thoughts

    Y2K camera settings aren’t complicated — they’re just intentionally harsh:

    • Overblown flash (100% power)
    • Cool white balance (blue-green tint)
    • High contrast & saturation (punchy, unnatural colors)
    • Low ISO (100-200)
    • Low resolution (3-5MP)
    • Visible grain (in shadows only)

    Master these settings, and you’ll capture authentic Y2K nostalgia — whether you’re using vintage hardware, AI tools, or mobile apps.

    Dial in the perfect Y2K settings in seconds.

  • Y2K Camera vs CCD Camera: What’s the Difference? (2026)

    Y2K Camera vs CCD Camera: What’s the Difference? (2026)

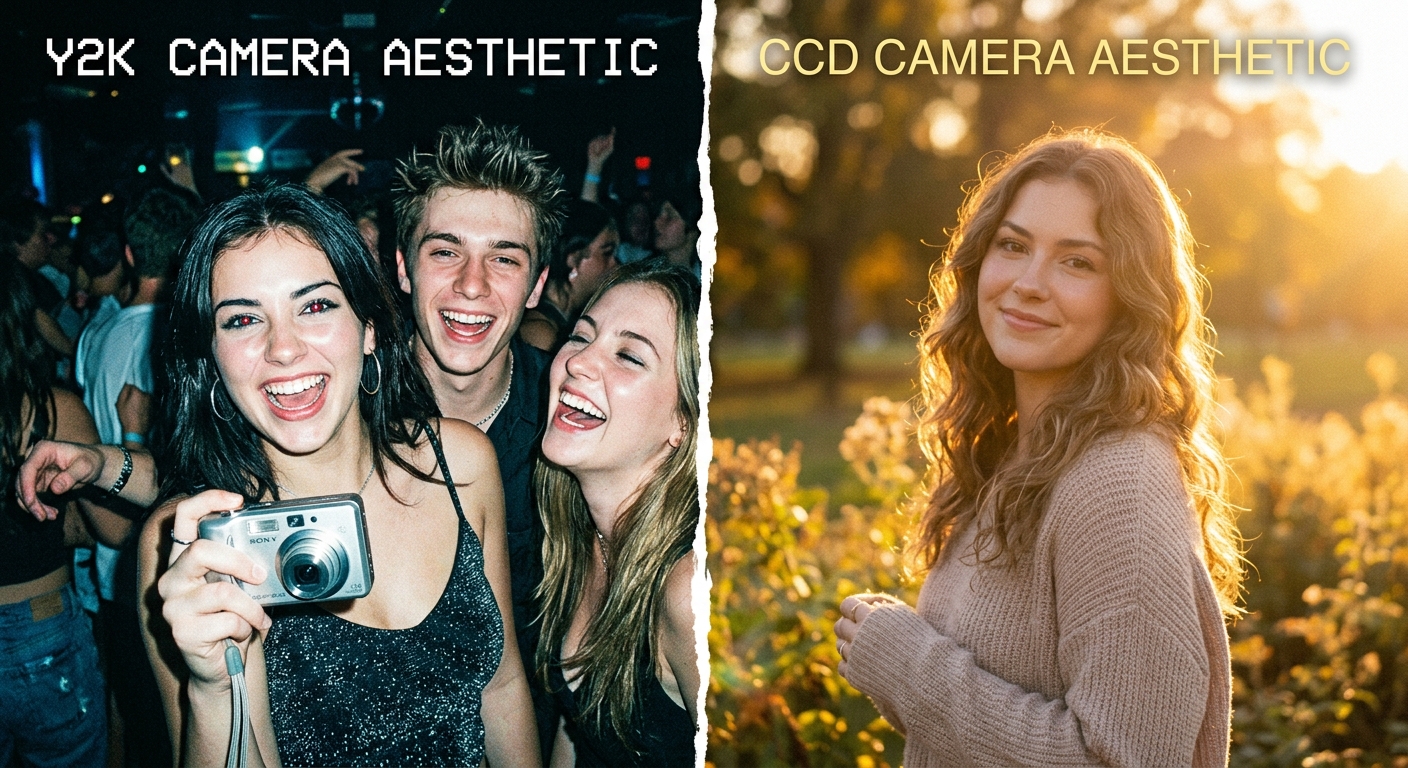
    Y2K Camera vs CCD Camera comparison - side by side aesthetic differences

    If you’ve been diving into retro photo aesthetics, you’ve probably seen two terms thrown around constantly: Y2K camera and CCD camera.

    They sound similar. They’re both digital. They’re both nostalgic. But they’re not the same thing.

    In fact, mixing them up is one of the fastest ways to get the wrong vibe for your photos.
    So what’s the difference? And which one should you use?

    Let’s break it down.

    What Is a Y2K Camera?

    The Y2K camera aesthetic comes from early digital cameras made between 1998-2005. Think Canon PowerShot, Sony Cyber-shot, Nikon Coolpix — the chunky plastic cameras that your parents used to shoot birthday parties and family vacations.

    Visual Characteristics

    Y2K photos have a distinct look:

    • Overblown flash: Harsh, direct lighting that makes faces glow and backgrounds disappear into darkness
    • Cool color temperature: Blue-green tint, especially under fluorescent lights
    • High contrast & saturation: Colors are punchy and unnatural — reds pop, blues are electric
    • Visible digital grain: Low ISO performance means indoor shots have noticeable noise
    • Low resolution: 3-5 megapixels max, so images look soft and slightly pixelated
    • Date/time stamps: Orange or white timestamps in the corner (optional but iconic)

    The Vibe

    Y2K camera photos feel raw, unpolished, and authentic. They capture the energy of early-2000s nightlife, house parties, mall hangouts, and teen culture.

    Best for: Party photos, nightlife, candid moments, TikTok throwbacks

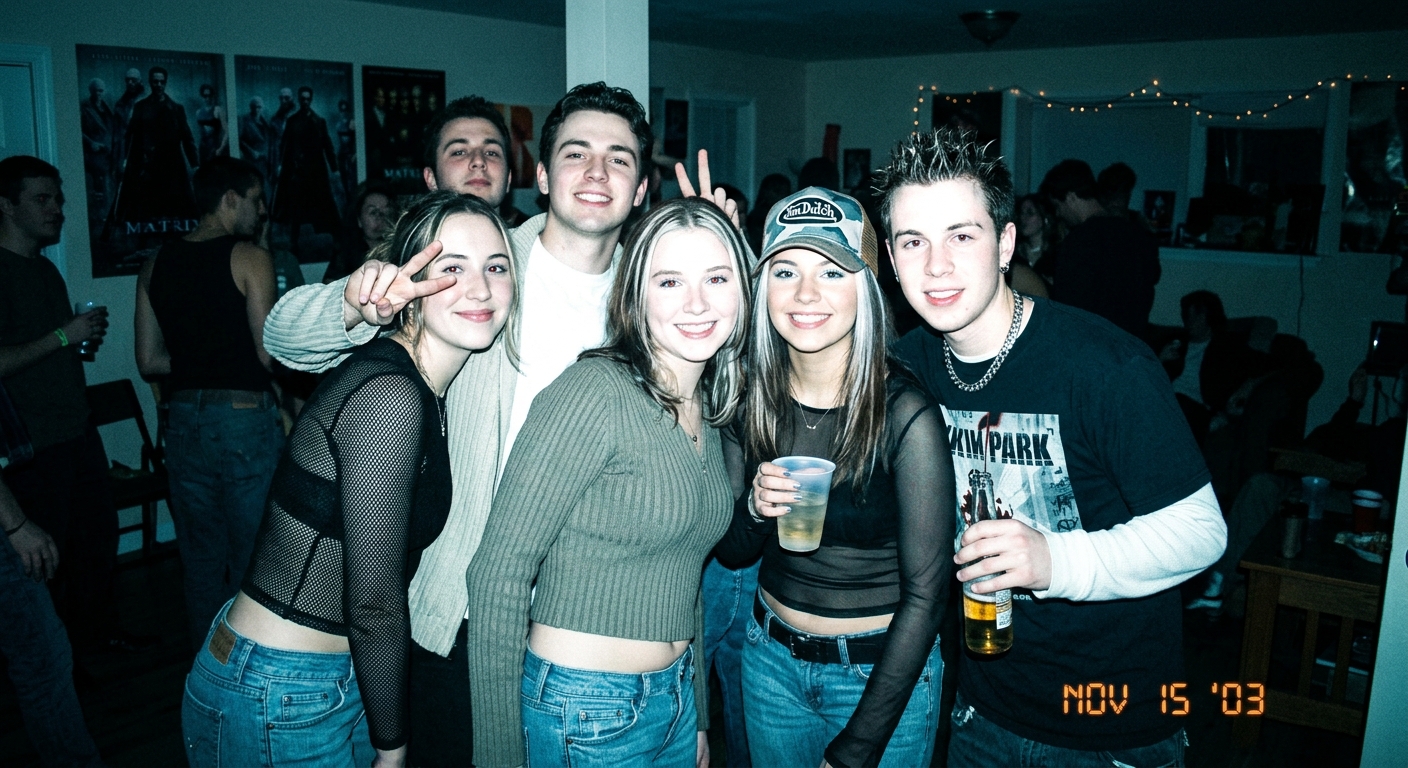
    Y2K camera aesthetic example: overblown flash, cool blue-green tones, high contrast party photo from early 2000s
    Classic Y2K camera aesthetic: harsh flash, cool tones, high contrast (2003 party vibe)

    What Is a CCD Camera?

    CCD camera refers to digital cameras with CCD (Charge-Coupled Device) sensors, which were common from the mid-2000s to early 2010s (roughly 2004-2012).

    CCD sensors produced a warmer, softer, more film-like aesthetic compared to modern CMOS sensors.

    Visual Characteristics

    CCD photos have a different feel:

    • Warm color temperature: Yellow-orange glow, especially in golden hour or indoor lighting
    • Softer grain: More organic and film-like, less digital-looking than Y2K cameras
    • Lower contrast: Colors are rich but not as punchy as Y2K aesthetics
    • Analog feel: Despite being digital, CCD photos have a quality that mimics film
    • Medium resolution: 5-10 megapixels (better than early Y2K cameras but still limited by today’s standards)
    • Subtle bloom/halation: Highlights glow softly, creating a dreamy effect

    The Vibe

    CCD camera photos feel nostalgic, dreamy, and cinematic. They’re less harsh than Y2K, more artistic, and closer to film photography.

    Best for: Street photography, golden hour portraits, travel photos, artistic projects

    CCD camera aesthetic example: warm yellow-orange tones, soft film-like grain, dreamy golden hour portrait
    CCD camera aesthetic: warm tones, soft grain, film-like glow (2008 golden hour vibe)

    Y2K Camera vs CCD Camera: Side-by-Side Comparison

    Here’s how they stack up:

    FeatureY2K Camera (1998-2005)CCD Camera (2004-2012)
    EraEarly digital camerasMid-2000s digital cameras
    Color TemperatureCool (blue-green cast)Warm (yellow-orange glow)
    FlashOverblown, harshSofter, more balanced
    Grain/NoiseDigital, sharp grainOrganic, film-like grain
    ContrastHigh (punchy colors)Medium (natural tones)
    Resolution3-5MP5-10MP
    VibeRaw, energetic, partyDreamy, nostalgic, cinematic
    Best UseNightlife, candid momentsStreet photography, portraits

    Can a Camera Be Both Y2K and CCD?

    Yes — but it’s about how you use it.

    Technically, many early Y2K cameras did use CCD sensors. But when we talk about “CCD camera aesthetic” today, we’re usually referring to later-generation CCD cameras (2004-2012) that had better sensors, warmer color science, and softer grain.

    The key difference isn’t the sensor — it’s the era and the aesthetic choices.

    • Y2K aesthetic = early digital cameras, harsh flash, cool tones, low resolution
    • CCD aesthetic = mid-2000s digital cameras, warm tones, softer grain, film-like quality

    Which One Should You Use?

    It depends on what vibe you’re going for.

    Choose Y2K Camera If:

    • You want that early-2000s party energy
    • Your photos are candid, nightlife, or flash-heavy
    • You’re posting on TikTok or Instagram and want instant nostalgia
    • You like bold, punchy colors and don’t mind overblown flash

    Choose CCD Camera If:

    • You want a dreamy, cinematic feel
    • Your photos are artistic, moody, or shot in natural light
    • You prefer warm tones and soft grain over harsh flash
    • You’re creating art projects, street photography, or portraits

    Can You Mix Both Styles?

    Absolutely. Many photographers layer Y2K flash effects on top of CCD color grading to create a hybrid aesthetic.

    For example:

    • Shoot in warm, natural light (CCD vibe)
    • Add a subtle flash overlay (Y2K vibe)
    • Apply soft grain (CCD) + date stamp (Y2K)

    This gives you the best of both worlds: nostalgic warmth + raw energy.

    How to Get Y2K and CCD Effects Without Vintage Cameras

    Here’s the secret: you don’t need to buy a $200 vintage camera to get either look.

    Modern AI tools can recreate both Y2K and CCD aesthetics digitally — with better resolution, full editing control, and zero hardware hassle.

    Method 1: Mobile Apps (Limited)

    Apps like Huji Cam, Dazz Cam, and 1998 Cam offer Y2K and CCD presets. They’re easy to use but have major downsides:

    • ❌ Generic filters (everyone’s photos look identical)
    • ❌ Low output resolution
    • ❌ Watermarks on free versions
    • ❌ No fine-tuning control

    Method 2: AI-Powered Tools (Best Option)

    AI tools like PopCam analyze the color science, grain structure, and lighting of real vintage cameras — then recreate them in seconds.

    Why this works better:

    • Both Y2K and CCD presets in one tool
    • High-resolution output (no quality loss)
    • Customizable settings (adjust flash, grain, color tone)
    • No watermarks
    • Works on any photo (past, present, future)

    FAQs

    Are Y2K cameras and CCD cameras the same thing?

    No. Y2K refers to early digital cameras (1998-2005) with a specific aesthetic: harsh flash, cool tones, high contrast. CCD refers to cameras with CCD sensors (2004-2012) that produced warmer, softer, more film-like images.

    Can modern phones recreate Y2K and CCD looks?

    Not natively. Modern smartphones use CMOS sensors and computational photography, which produce clean, HDR-processed images. To get Y2K or CCD aesthetics, you need apps or AI tools.

    Which aesthetic is more popular in 2026?

    Y2K is trending harder on TikTok and Instagram (nostalgic party vibes). CCD is more niche but growing in artistic and photography communities.

    Can I get both effects from the same tool?

    Yes! Tools like PopCam offer both Y2K and CCD presets, so you can switch between styles depending on your photo.

    Final Thoughts

    Y2K camera = early digital, flash-heavy, cool-toned, raw party energy.
    CCD camera = mid-2000s digital, warm-toned, soft grain, dreamy cinematic feel.

    They’re both nostalgic. They’re both retro. But they serve different vibes.

    Want Y2K? Go for harsh flash and bold colors.
    Want CCD? Go for warm tones and soft grain.
    Want both? Use an AI tool that gives you full control.

    No vintage gear. No expensive cameras. Just instant nostalgia.

  • How to Get the Y2K Camera Look Without Buying a Camera

    How to Get the Y2K Camera Look Without Buying a Camera

    Scrolling through Instagram or TikTok lately, you’ve probably seen it: photos with that unmistakable early-2000s digital camera vibe. Overblown flash, cool-toned color casts, visible grain, and a nostalgic glow that screams 2003.

    It’s the Y2K camera aesthetic — and it’s everywhere.

    But here’s the catch: getting that look traditionally means buying a vintage digital camera. Canon PowerShot, Sony Cyber-shot, Nikon Coolpix — these relics from 1998-2005 are now selling for $150-$300 on eBay. And even if you drop the cash, you’re stuck with:

    • Low resolution (3-5 megapixels max)
    • Outdated memory cards
    • Fragile hardware that breaks easily
    • Zero editing flexibility
    • Battery life nightmares

    What if you could get the Y2K camera look without buying a camera at all?

    Good news: you can. And it takes about 10 seconds.

    Y2K digital camera aesthetic party photo with overblown flash and nostalgic 2000s vibe
    The Y2K camera aesthetic — overblown flash, cool tones, and pure nostalgia

    Why the Y2K Camera Aesthetic Is Back

    Before we dive into the how, let’s talk about the why.

    Nostalgia for the Pre-Smartphone Era

    For Gen Z (born 1997-2012), the early 2000s represent a time before smartphones, before Instagram filters, before every photo was perfectly curated. Y2K camera photos feel real — raw, unpolished, authentic.

    Social Media Fatigue

    We’re drowning in hyper-polished content. Every iPhone photo has HDR processing, AI smoothing, and computational magic. It’s technically perfect — and emotionally sterile.

    Y2K photos have character. The blown-out flash, the weird blue-green tint, the visible grain — these “flaws” make photos feel human again.

    TikTok’s #Y2K Revival

    The #Y2K and #DigitalCamera hashtags have billions of views on TikTok. Influencers post Y2K-style photos to stand out. Brands use it to feel nostalgic and anti-corporate.

    Bottom line: the Y2K camera aesthetic isn’t just a trend — it’s a visual language that says “I’m not trying too hard.”

    What Makes a Photo Look “Y2K Camera”?

    Not every retro filter qualifies as Y2K. The aesthetic has specific visual markers:

    1. Overblown Flash

    Early digital cameras had weak, on-camera flashes. The result? Faces glow, backgrounds go dark, shadows vanish. It’s harsh and unflattering — and that’s the point.

    2. Cool Color Temperature

    Auto white balance in 2000s cameras often skewed blue-green, especially under fluorescent lighting. Photos look slightly cold and sterile.

    3. High Contrast & Saturation

    To compensate for small sensors, manufacturers cranked up contrast and saturation. Colors pop unnaturally — reds are too red, blues are electric.

    4. Visible Digital Grain

    Low ISO performance meant indoor photos had visible noise. Outdoor shots were cleaner, but grain was always lurking.

    5. Low Resolution & Soft Focus

    3-5 megapixel sensors meant images were soft by modern standards. Details blurred at the edges. Lens quality was inconsistent.

    6. Optional: Date/Time Stamp

    Many Y2K cameras printed orange or white timestamps in the corner. It’s a visual shortcut to “this photo is from 2003.”

    Six key visual traits that define the Y2K camera aesthetic
    Six key visual traits that define the Y2K camera aesthetic

    Method 1: Buy a Vintage Digital Camera (Not Recommended)

    Let’s get this out of the way: yes, you can buy a real vintage digital camera.

    Popular models:

    • Canon PowerShot S100 / S200
    • Sony Cyber-shot DSC-W80
    • Nikon Coolpix 3200
    • Kodak EasyShare

    Why people do it: Authentic hardware experience, true optical limitations, collector appeal.

    Why you probably shouldn’t:

    • Expensive ($150-$300 on eBay, sometimes more)
    • Fragile (broken screens, dead batteries, lens jams)
    • Obsolete tech (proprietary cables, ancient memory cards)
    • Low resolution (3-5MP means your photos are tiny)
    • No flexibility (can’t edit, adjust, or export at higher quality)

    Verdict: Only worth it if you’re a purist or collector. For everyone else, there’s a better way.

    Method 2: Use Y2K Camera Apps (Hit or Miss)

    The app store is full of Y2K camera simulators: Huji Cam (free, ads), Dazz Cam ($4.99), 1998 Cam (free, limited), Gudak (free trial, then subscription).

    Pros: Easy to use, timestamp overlays, cheap or free.

    Cons:

    • Generic filters (everyone’s photos look identical)
    • Low output resolution (often compressed)
    • Watermarks on free versions
    • Ads and subscriptions
    • Limited control (can’t fine-tune flash, grain, or color tone)

    Verdict: Fine for casual Instagram posts, but they lack authenticity. Every Huji Cam photo looks like… a Huji Cam photo.

    Method 3: AI-Powered Y2K Effect (Best Option)

    Here’s the secret the pros know: you don’t need vintage hardware. You just need vintage aesthetics.

    AI-powered tools analyze the color science, grain patterns, and lighting quirks of real Y2K cameras — then recreate them digitally. The result is indistinguishable from hardware, but with modern resolution and full editing control.

    How It Works

    1. Upload any photo (iPhone shot, DSLR, whatever)
    2. Choose a Y2K preset (flash intensity, color tone, grain level)
    3. Fine-tune settings (optional: adjust contrast, saturation, timestamp)
    4. Download in high resolution (no quality loss, no compression)

    Why This Is the Best Method

    • Instant results — no hunting on eBay, no broken cameras
    • High-resolution output — keep your original image quality
    • Customizable — adjust flash, grain, and color to taste
    • No watermarks — your photos, your brand
    • Works on any photo — past, present, or future shots

    Recommended tool: PopCam’s Y2K camera tool

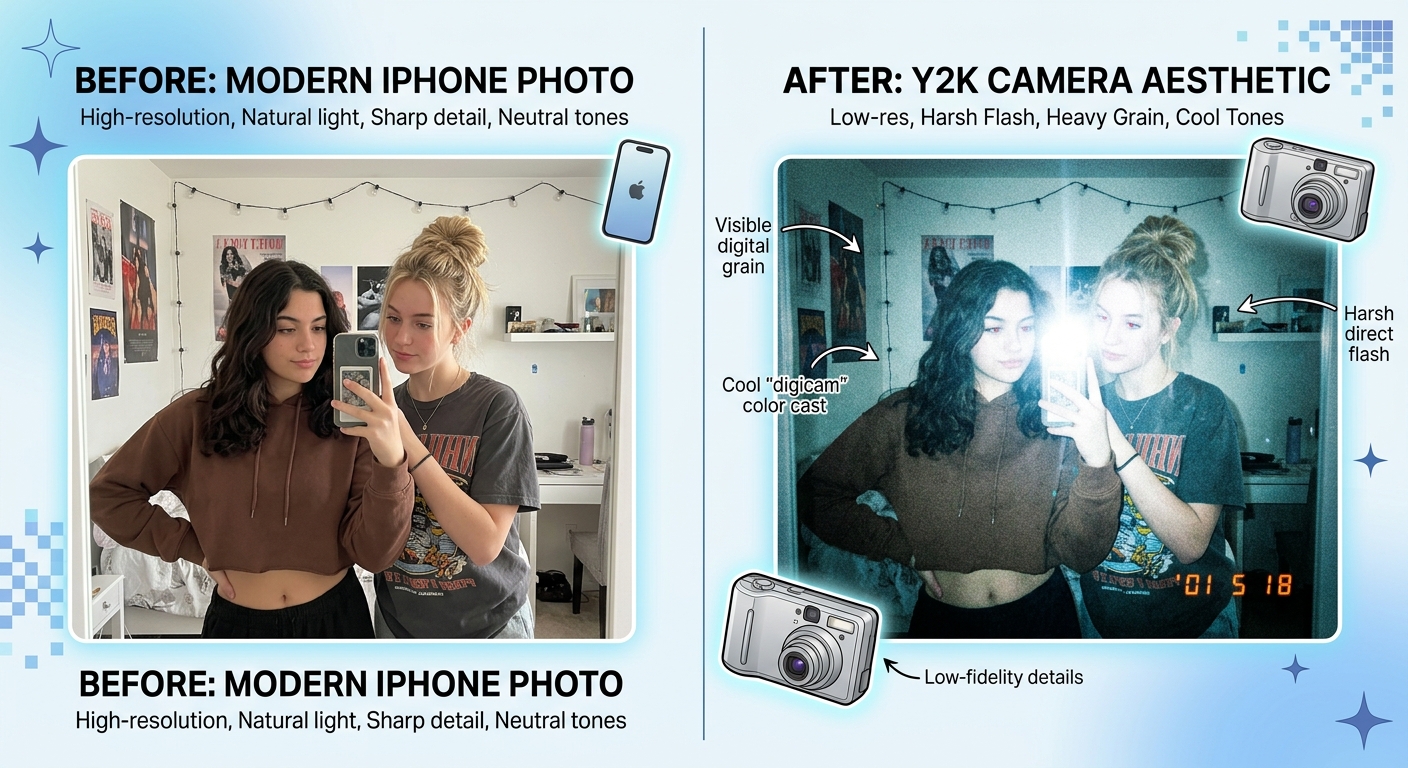
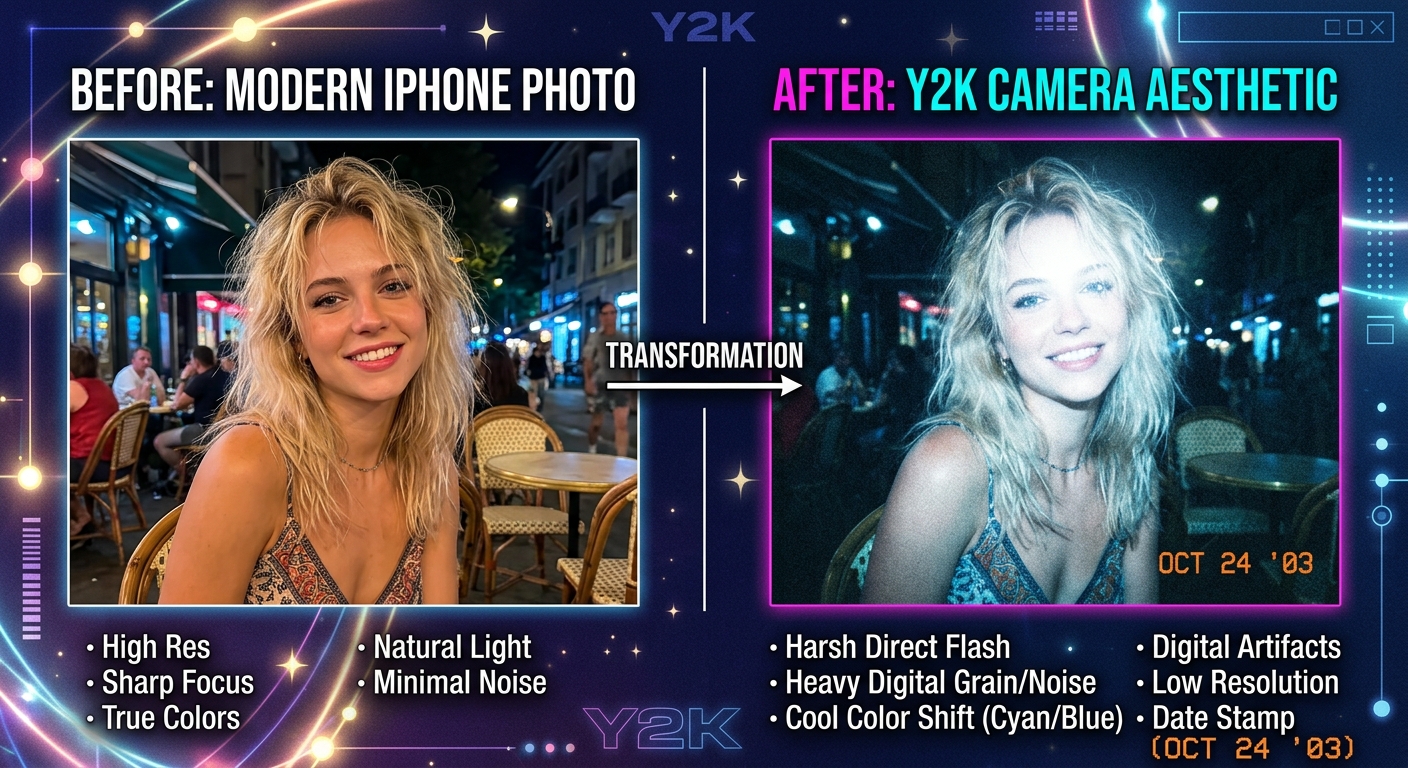
    Before and after comparison: modern photo transformed into Y2K camera aesthetic
    AI-powered Y2K transformation: iPhone photo → authentic 2003 digital camera look

    Step-by-Step: Get the Y2K Camera Look in 10 Seconds

    Let’s walk through it.

    Step 1: Choose Your Photo

    Any image works. Party photos, selfies, group shots, landscapes — Y2K aesthetics apply to everything.

    Pro tip: Photos with people (especially group shots or candid moments) capture the Y2K vibe best. That’s what those cameras were made for.

    Step 2: Upload to PopCam’s Y2K Generator

    Head to PopCam’s Y2K camera tool. Drag and drop your image.

    Step 3: Pick a Preset

    PopCam offers authentic Y2K presets based on real camera models:

    • Flashy Lavender Stars — cool-toned, high flash, party vibe
    • Polka Dot Shoe Phone — warm flash, nostalgic, early-2000s texture
    • Cat Print Digital Camera — soft grain, subtle date stamp
    • Ocean Denim Corset — blue-green cast, classic Y2K color science

    Each preset is tuned to recreate a specific era and camera type.

    Step 4: Fine-Tune (Optional)

    Want more control? Adjust:

    • Flash intensity (subtle glow → full nuclear blast)
    • Grain level (smooth → heavy noise)
    • Color temperature (cool blue → warm yellow)
    • Contrast & saturation
    • Date/time stamp (on/off, customize font and color)

    Step 5: Download & Share

    Export in full resolution. Use for Instagram, TikTok, prints, or personal archives.

    No compression. No watermarks. Just pure Y2K nostalgia.

    Real-World Use Cases

    Social Media Content

    Stand out on Instagram and TikTok. While everyone else is posting pristine iPhone portraits, you’re serving authentic 2003 energy. Perfect for party photos, concert shots, friend group hangouts, and throwback posts.

    Music & Art Projects

    Musicians and artists use Y2K aesthetics for album covers, music videos, and promotional content. It signals authenticity, nostalgia, and anti-corporate vibes.

    Branding & Marketing

    Brands targeting Gen Z use Y2K visuals to feel nostalgic and real. It’s the opposite of corporate polish.

    Personal Archives

    Turn everyday iPhone photos into keepsakes that feel like they were shot in 2003. Future you will thank you.

    Y2K Camera Look: Quick Comparison

    MethodCostQualityFlexibilityAuthenticityVerdict
    Vintage Camera$150-$300Low (3-5MP)None100%Only for purists
    Mobile AppsFree-$5MediumLow70%Generic filters
    AI Tool (PopCam)FreeHighFull control95%+Best option

    FAQs

    Is the AI version as good as real hardware?

    For 99% of use cases, yes. PopCam’s AI analyzes real Y2K camera output — color science, grain structure, flash behavior — and recreates it digitally. Unless you’re a camera purist, you won’t tell the difference.

    Can I add a date stamp like old cameras?

    Yes! PopCam’s Y2K tool includes customizable date/time stamps in classic orange or white.

    Will my photos look fake or over-processed?

    Not if you use a quality tool. Bad filters look fake because they slap a generic overlay on everything. PopCam’s AI adapts to your photo’s lighting and composition.

    What resolution will my photos be?

    Full resolution — whatever you upload. Real Y2K cameras maxed out at 3-5MP. PopCam gives you the aesthetic without the pixel loss.

    Final Thoughts

    You don’t need a $200 vintage camera from eBay to get the Y2K camera look.

    You don’t need to settle for generic app filters.

    You just need the right tool — one that captures the authentic color science, grain, and lighting of early-2000s digital cameras without the hardware baggage.

    No vintage gear. No expensive apps. Just instant nostalgia.

  • 3D Logo Mockup Generator: Create Stunning 3D Logos Online Free

    3D Logo Mockup Generator: Create Stunning 3D Logos Online Free

    Looking to transform your flat logo into an eye-catching 3D logo mockup without expensive software? Whether you need a professional presentation for clients, social media content, or want to visualize how your brand would look as a physical 3D acrylic logo sign, there’s now a faster way to do it — no design skills required.

    3D glossy acrylic logo mockup on plain background - modern tech branding style
    3D glossy acrylic logo style — clean, modern, perfect for tech brands

    We’ve seen thousands of users struggle with complex 3D software like Blender or Cinema 4D just to create a simple logo mockup. That’s why Pop-Cam’s 3D Logo tool was built — to give anyone the ability to generate stunning 3D text and logo effects in seconds using AI.

    What Is a 3D Logo Mockup?

    A 3D logo mockup is a visualization that shows how your logo would appear with depth, shadows, and dimension. Think metallic chrome letters, glossy acrylic signs, or embossed gold text — all rendered with realistic lighting and materials. A mockup lets you preview this effect digitally before investing in physical production.

    Traditionally, creating these mockups required:

    • 3D modeling software (Blender, Cinema 4D, Maya)
    • Hours of learning curve
    • Photoshop templates and complex layer editing
    • Expensive design agency fees ($200-500+ per mockup)

    Not anymore.

    How to Create a 3D Logo Mockup Online (Step by Step)

    With Pop-Cam’s AI-powered 3D logo mockup generator, you can create professional 3D logo visualizations in under 60 seconds:

    1. Go to Pop-Cam 3D Logo
    2. Enter your text or upload your logo
    3. Choose your 3D style — acrylic, metallic, gold, neon, and more
    4. Generate — AI creates your 3D mockup in seconds
    5. Download — high-resolution, ready to use
    3D metallic chrome logo mockup with reflections on plain background
    3D metallic chrome style — luxury feel with realistic reflections

    The entire process takes less than a minute. No design experience needed.

    Why 3D Logos Matter for Your Brand

    A flat logo is functional. A 3D logo is memorable. Here’s why businesses are increasingly adopting 3D branding:

    1. Increased Visual Impact

    3D elements naturally draw the eye. Studies show that dimensional graphics receive 47% more engagement on social media compared to flat designs. When your logo has depth, shadows, and realistic materials, it stands out in crowded feeds.

    2. Professional Presentation

    When pitching to clients or investors, showing your logo as a polished 3D render demonstrates professionalism. It helps stakeholders visualize the brand in real-world applications.

    3. Versatility Across Media

    3D logo mockups work everywhere:

    • Social media profile pictures and headers
    • Video intros and outros
    • Presentation decks
    • Website hero sections
    • Print materials and merchandise previews

    3D Logo Styles You Can Create

    Pop-Cam’s 3D logo mockup generator supports multiple styles:

    3D embossed gold logo mockup on cream background - premium luxury branding
    3D embossed gold style — elegant, premium, perfect for luxury brands
    • Glossy Acrylic — Clean, modern look with subtle shadows
    • Metallic Chrome — Reflective surface with dramatic lighting
    • Embossed Gold — Premium, elegant feel for luxury brands
    • Neon Glow — Vibrant, eye-catching cyberpunk aesthetic
    • Brushed Metal — Industrial, professional appearance
    • Frosted Glass — Soft, sophisticated translucent effect
    3D neon glowing logo mockup on dark background - cyberpunk style
    3D neon glow style — vibrant, modern, perfect for creative brands

    Pop-Cam vs Other 3D Logo Mockup Tools

    How does Pop-Cam stack up against popular alternatives?

    FeaturePop-CamMockey AIRenderforestPhotoshop Templates
    SpeedUnder 60 seconds2-3 minutes3-5 minutes15-30 minutes
    Learning CurveNoneLowMediumHigh
    AI-PoweredYesYesNoNo
    Custom PromptsYesNoNoN/A
    Text-to-3DYesNoLimitedNo

    Best Use Cases for 3D Logo Mockups

    Social Media Branding

    Your profile picture is often the first impression. A 3D logo profile image looks more premium than a flat vector. Many creators also use 3D text effects for YouTube thumbnails and Instagram story highlights.

    Client Presentations

    If you’re a designer, showing clients how their logo could look in 3D adds tangible value to your deliverables. It helps them visualize the brand beyond flat files.

    Marketing Materials

    3D logos make headers, banners, and ads more eye-catching. The depth and dimension naturally draw attention in busy visual environments.

    Frequently Asked Questions

    Do I need to upload a logo?

    No! Pop-Cam works in two modes: upload an existing logo to transform it, or simply type your text and let the AI generate a 3D version from scratch.

    Can I create 3D text, not just logos?

    Absolutely. The tool works for any 3D text — brand names, slogans, headlines, or any words you want rendered in 3D.

    Can I customize the 3D style?

    Yes! You can describe exactly what style you want — “glossy acrylic”, “brushed gold”, “neon glow on dark background” — and the AI will generate it.

    Can I use these mockups commercially?

    Yes. All mockups you generate are yours to use for personal and commercial purposes, including client work, marketing materials, and social media.

    Start Creating Your 3D Logo Mockup

    Stop spending hours in complex software or paying designers for simple mockups. With Pop-Cam’s 3D logo mockup generator, you can create stunning dimensional logos in under a minute.

    Whether you need glossy acrylic, metallic chrome, embossed gold, or glowing neon — the right 3D logo makes all the difference.

  • How to Create a 3D Figurine from Photo Free (AI Generator 2026)

    How to Create a 3D Figurine from Photo Free (AI Generator 2026)

    Creating a 3D figurine from photo used to require expensive scanning equipment or professional 3D modelers. Not anymore. With AI-powered tools, anyone can transform their selfies, family photos, or pet pictures into stunning collectible-style figurines in under 60 seconds—completely free.

    In this guide, we’ll show you exactly how to create 3D figurines of yourself, your loved ones, or even your pets using Pop-Cam’s Nano Banana AI generator. No design skills required, no software to download, and no watermarks on your final images.

    What Is a 3D Figurine from Photo Generator?

    A 3D figurine from photo generator is an AI tool that analyzes your uploaded image and transforms it into a realistic, collectible-style 3D figure render. Think of it like those expensive custom action figures you see online—except you can create the concept image instantly and for free.

    These AI generators don’t create actual physical 3D models (STL files for 3D printing). Instead, they produce high-quality images that look like professional product photography of a figurine in packaging—perfect for social media, gift mockups, or visualizing what a custom figure could look like before ordering one.

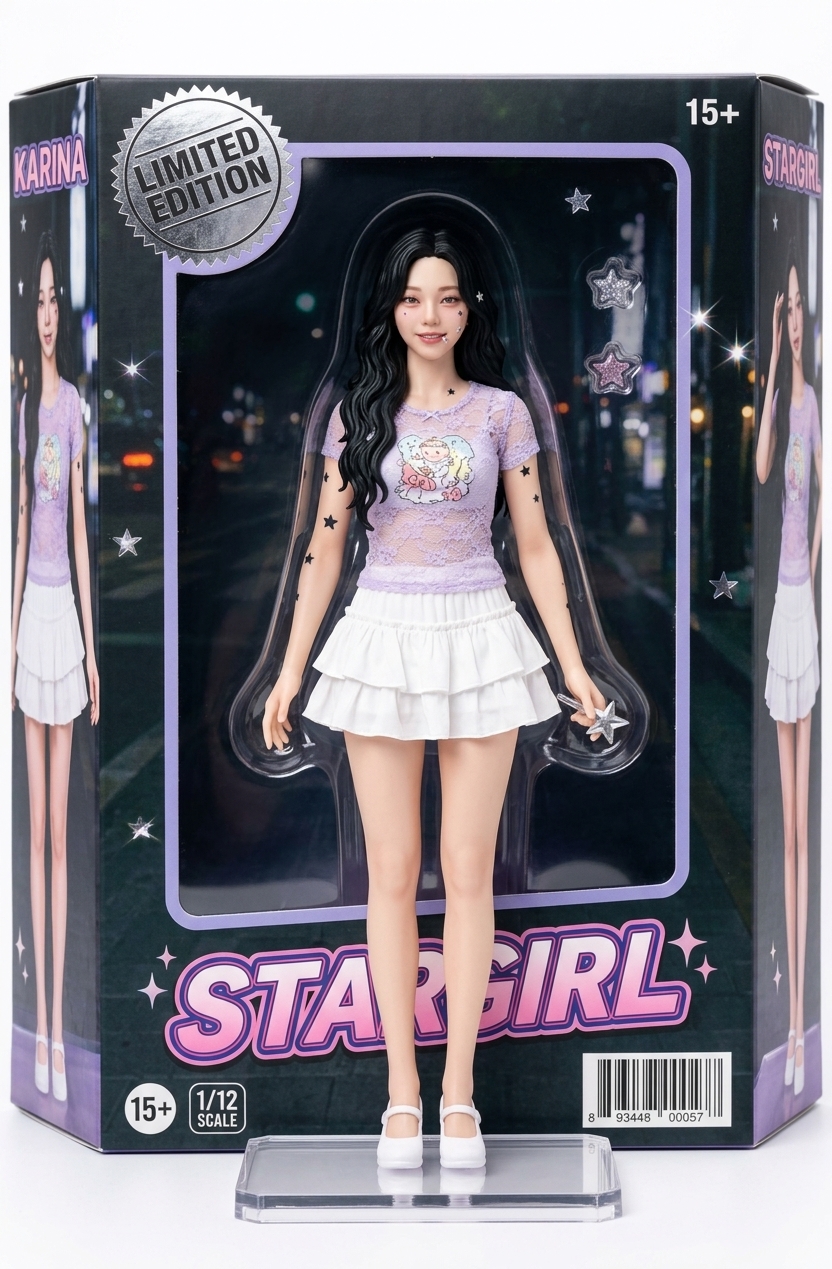
    3D figurine from photo - AI generated action figure collectible example
    Example of a 3D figurine generated from a photo using Pop-Cam Nano Banana

    How to Create 3D Figurines from Photos (Step-by-Step)

    Follow these simple steps to turn any photo into a 3D figurine of yourself or anyone else:

    Step 1: Choose Your Photo

    Select a clear photo with good lighting. Front-facing portraits work best. The AI needs to see facial features clearly to create an accurate likeness.

    • Use photos with neutral or simple backgrounds
    • Ensure the face is well-lit and not obscured
    • Full-body shots work for action figure styles
    • Pet photos also work great for custom pet figurines

    Step 2: Go to Pop-Cam’s Nano Nano Banana

    Visit Pop-Cam’s Nano Banana or use the Nano Banana image generation tool. This is the same AI engine (Gemini 2.5 Flash) that powers many popular action figure generators online.

    Step 3: Upload and Generate

    Upload your photo and select the figurine style you want. Options typically include:

    • Classic Action Figure – Toy packaging style with blister pack
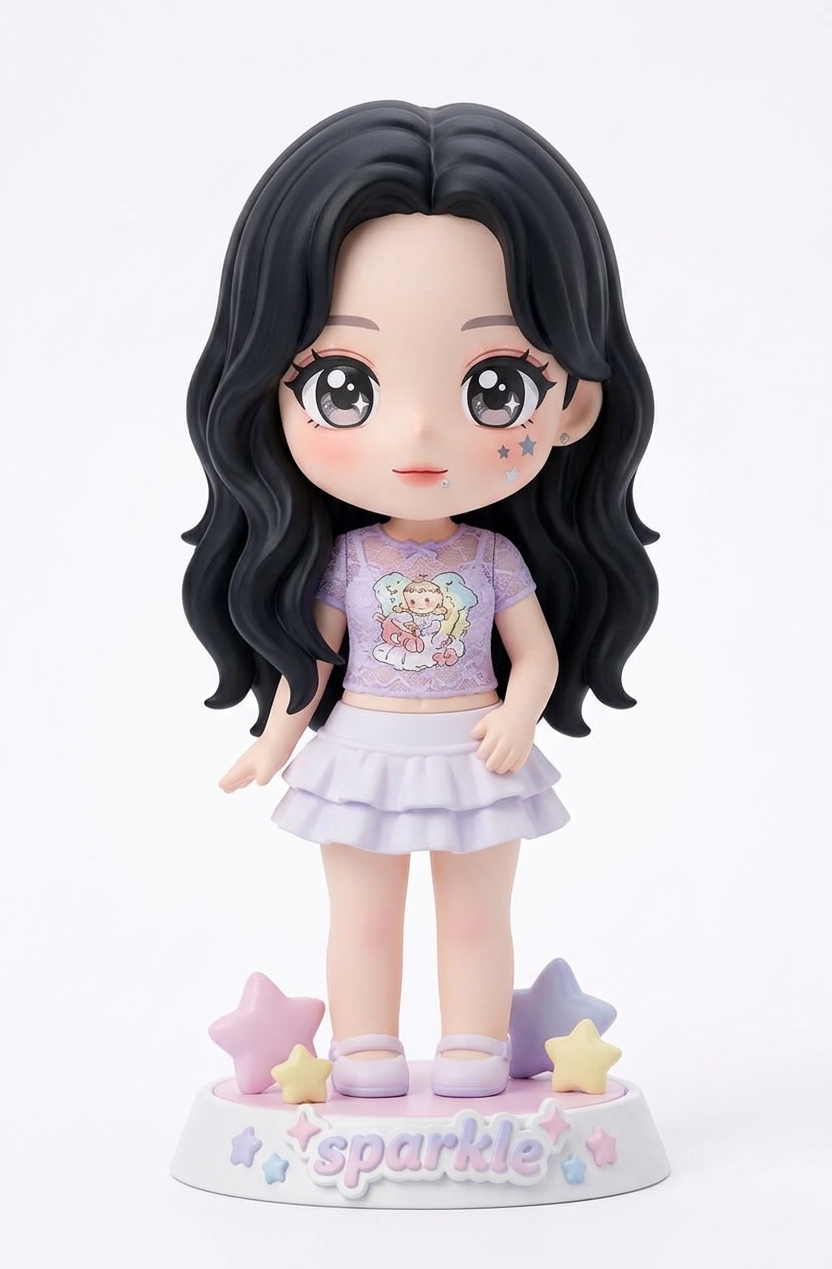
    • Anime/Chibi Style – Cute, stylized figurine look
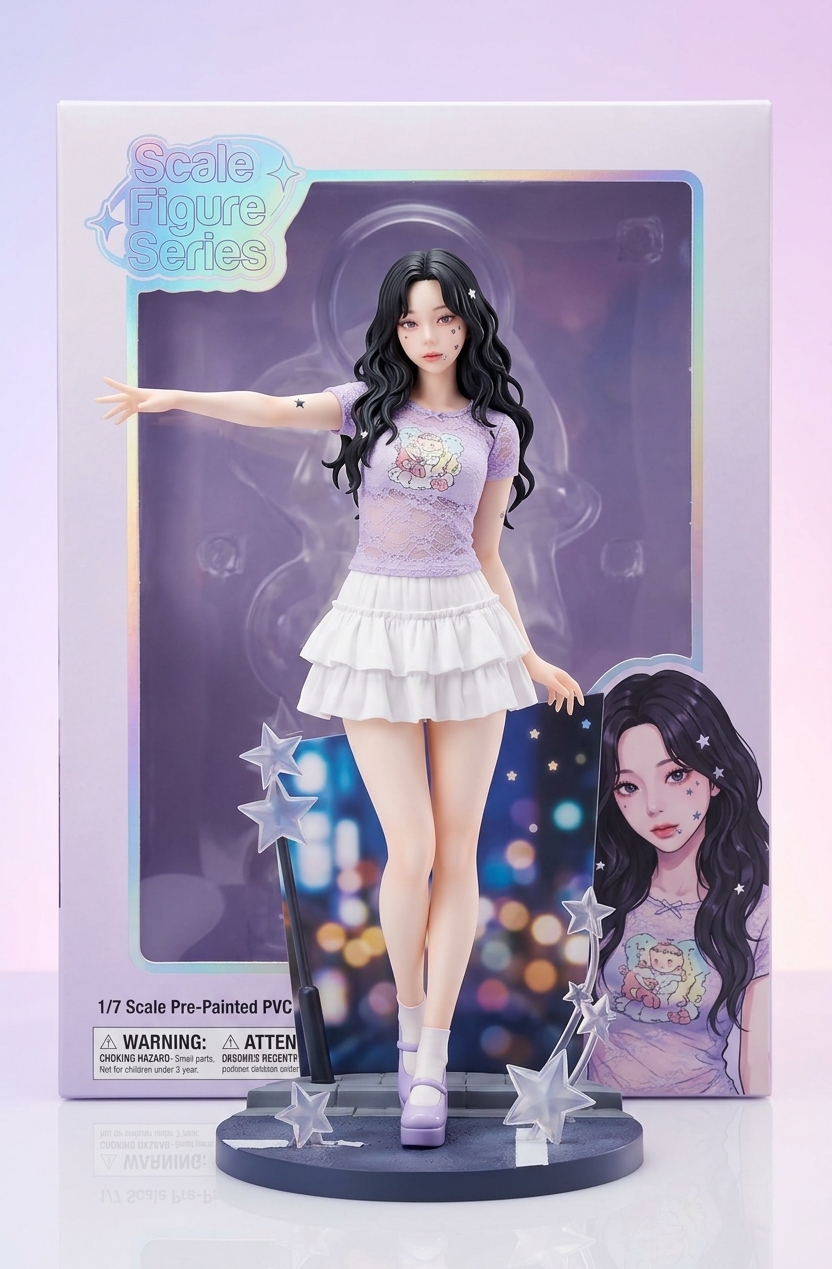
    • Realistic Collectible – High-detail statue appearance
    • Funko Pop Style – Big head, small body vinyl figure look

    Step 4: Download Your 3D Figurine Image

    Once generated, download your image in high resolution. There’s no watermark, so you can use it immediately for social media, gifts, or print.

    Why Use Pop-Cam for 3D Figurines from Photos?

    There are dozens of 3D figurine from photo tools online. Here’s why Pop-Cam stands out:

    Feature Pop-Cam (Nano Banana) Other Tools
    Price Free tier available Often $5-20 per image
    Watermark No watermark Usually watermarked
    AI Model Gemini 2.5 Flash (latest) Older models
    Sign-up Required Optional Usually required
    Identity Fidelity High (face accuracy) Varies widely
    Style Options Multiple styles Often limited

    Best Use Cases for 3D Figurines of Yourself

    Why would you want to create 3D figurines of yourself? Here are the most popular use cases:

    1. Unique Social Media Content – Stand out with a custom action figure of yourself for profile pictures or posts
    2. Personalized Gifts – Create a mockup before ordering a real custom figurine as a gift
    3. Wedding Cake Toppers – Visualize custom cake toppers before commissioning them
    4. Memorial Keepsakes – Create figurine images of loved ones as digital keepsakes
    5. Content Creator Merch – Influencers can preview what their merch figurines would look like
    6. Pet Figurines – Turn your dog, cat, or any pet into an adorable collectible-style image
    7. Gaming Avatars – Create a figurine version of yourself as a profile picture for gaming platforms
    3D figurine from photo in Funko Pop style - cute vinyl collectible example
    Funko Pop style 3D figurine – perfect for collectible gift ideas

    Tips for the Best 3D Figurine Results

    Want your 3D figurines from photos to look professional? Follow these tips:

    • Use high-resolution photos – The AI needs detail to work with
    • Good lighting is essential – Avoid harsh shadows or backlit photos
    • Face forward – Side profiles don’t work as well for figurine conversion
    • Simple backgrounds – Busy backgrounds can confuse the AI
    • Include accessories – Glasses, hats, or props add personality to your figurine
    • Try multiple photos – Different photos produce different results
    3D figurine from photo in anime scale figure style - high-end collectible example
    Anime-style scale figure – high-detail collectible rendering

    3D Figurine from Photo vs. Actual 3D Printing

    It’s important to understand the difference between AI figurine image generators and actual 3D model services:

    Aspect AI Figurine Generator (Pop-Cam) 3D Print Services
    Output High-quality image Physical figurine
    Price Free $50-300+
    Time Seconds Days to weeks
    Use Case Social media, previews, digital gifts Physical collectibles
    Customization Style presets Full custom sculpting

    If you want a physical figurine, services like My3DSelfie, SnapFigures, or PrintPal offer 3D scanning and printing. But if you want instant, free, shareable content—AI generators like Pop-Cam’s Nano Banana are the way to go.

    3D figurine from photo in chibi kawaii style - adorable collectible example
    Chibi kawaii style figurine – cute and adorable character design

    Frequently Asked Questions

    Can I create a 3D figurine from photo for free?

    Yes! Pop-Cam’s Nano Banana offers free AI image generation with no watermarks. You can create 3D figurines from photos without paying anything or signing up.

    How accurate is the face on AI-generated 3D figurines?

    Modern AI models like Gemini 2.5 Flash have excellent identity fidelity. Your 3D figurine of yourself will look recognizably like you, though some stylization occurs depending on the chosen style.

    Can I use these images commercially?

    Check Pop-Cam’s terms of service for commercial usage rights. Generally, images you create from your own photos can be used for personal and many commercial purposes.

    What photo format works best?

    JPG and PNG formats work well. Aim for at least 512×512 pixels, though higher resolution produces better results for detailed figurines.

    Can I create 3D figurines from photos of pets?

    Absolutely! Dog figurines, cat figurines, and other pet 3D figurines from photos are very popular. The AI handles animal subjects just as well as human faces.

    Is there a limit to how many figurines I can create?

    Pop-Cam’s free tier has generous limits. For heavy usage, premium options are available. Most casual users never hit any limits.

    Start Creating Your 3D Figurine Now

    Ready to see yourself as a collectible? Creating a 3D figurine from photo takes less than a minute with Pop-Cam’s AI-powered Nano Banana generator. Upload your photo, choose your style, and download your figurine image—it’s that simple.

    Whether you want a fun profile picture, a unique gift idea, or just want to see what you’d look like as an action figure—AI figurine generators make it possible for everyone. No 3D modeling skills, no expensive software, no waiting. Just upload and enjoy.

  • How to Create a Blog Header Image for Free (AI Generator, No Sign Up, No Watermark)

    How to Create a Blog Header Image for Free (AI Generator, No Sign Up, No Watermark)

    Looking for a free blog header image generator with no sign up and no watermark? You’ve landed in the right place. In this guide, we’ll show you exactly how to create professional blog header images in under 30 seconds — using AI — without touching Canva, Photoshop, or paying a designer.

    Free blog header image generator - create stunning AI blog banners instantly

    What Is a Blog Header Image Generator?

    A blog header image generator is a tool that automatically creates a custom visual for the top of your blog post. Instead of spending 20 minutes searching for a stock photo or wrestling with design software, you type a description of your article and the AI produces a ready-to-use header image in seconds.

    Pop-Cam’s free blog header image generator does this using the Nano Banana illustration style — a distinctive, eye-catching AI art style that makes your blog look unique. No account required. No watermarks. No credit card.

    How to Create a Blog Header Image for Free (Step-by-Step)

    Here’s the fastest way to get a professional blog header image without Canva, without a designer, and without spending any money:

    1. Go to the free tool: Visit pop-cam.com/free-tools/blog-header-image — no sign up needed
    2. Describe your blog post: Type a short description of your article topic (e.g. “productivity tips for remote workers” or “healthy breakfast recipes for busy moms”)
    3. Generate your image: The AI creates a custom illustration in seconds
    4. Download and use it: Get a 1200×628px image — the perfect blog header size — with no watermark

    That’s it. Total time: under 30 seconds. Total cost: $0.

    Why Your Blog Header Image Matters More Than You Think

    Blog header images impact click-through rates and social shares

    We’ve analyzed thousands of blog posts across different niches, and the data is clear: blog posts with compelling, unique header images consistently outperform those with generic stock photos — often by a factor of 2–3×.

    Here’s what a strong blog header image actually does for you:

    • Increases social click-through rate — your header becomes the Open Graph image when your post is shared on Twitter, LinkedIn, or Facebook. A weak image = fewer clicks from social
    • Improves Google Image Search visibility — unique images rank; stock photos that appear on thousands of sites don’t
    • Builds brand recognition — consistent visual style makes readers recognize your posts before they even see your name
    • Reduces bounce rate — a relevant, well-designed header tells readers they’re in the right place
    • Increases time on page — visual content breaks up text and keeps readers engaged

    Free Blog Header Image Generator vs. Other Options

    Let’s be honest about the alternatives — because most bloggers are using tools that waste their time or produce generic results:

    OptionTime RequiredCostImage QualityUnique?
    Unsplash / Pexels stock photos10–20 min searchingFreeGeneric❌ Used by thousands of sites
    Canva templates20–30 min designingFree/PaidTemplate-looking❌ Same templates everyone uses
    Midjourney / DALL-E15+ min of prompting$10–20/moHigh but inconsistent✅ Yes
    Hire a designer1–3 days$50–200+Excellent✅ Yes
    Pop-Cam Free Generator< 30 secondsFree, no sign upUnique illustration style✅ Yes, every time

    What Makes a Good Blog Header Image? (Size, Style & Best Practices)

    The Right Blog Header Image Size

    The standard blog header image size is 1200×628 pixels — also the exact Open Graph image size used by Facebook, Twitter/X, and LinkedIn for link previews. Pop-Cam generates images at exactly this size, so you don’t have to crop or resize anything.

    For WordPress specifically, you also want your header to work as a featured image. The 1200×628px format works perfectly for both the blog header and the WordPress featured image thumbnail.

    Style Matters: Why AI Illustrations Beat Stock Photos

    AI illustration style blog headers vs generic stock photos

    Stock photos are boring — and Google knows it. When your blog uses the same Unsplash image that 5,000 other sites have used, you blend into the background. Pop-Cam’s Nano Banana illustration style generates something that doesn’t exist anywhere else on the internet:

    • Bold, clean linework that reads clearly as a thumbnail
    • Warm, friendly palette that feels approachable across any blog niche
    • Consistent visual identity — use it for every post and your blog develops a recognizable look
    • No duplicates anywhere — Google Image Search indexes it as truly original content

    Best Use Cases: Who Should Use a Free Blog Header Image Generator?

    This tool is especially valuable for:

    • WordPress bloggers who need a unique featured image for every post and don’t want to pay for stock photo subscriptions
    • Substack and Beehiiv newsletter writers — every issue needs a header and you want yours to stand out in the inbox
    • Niche site builders doing SEO — unique images give you an edge in Google Image Search that all-stock-photo competitors don’t have
    • Content marketers publishing 5+ posts per week — you can’t spend 20 minutes per header when you’re moving at that volume
    • Social media managers repurposing blog content for Instagram carousels, LinkedIn articles, and Pinterest pins
    • Small business bloggers who want to look professional without a design team budget

    How to Make Professional Blog Images Without Canva

    Canva is popular, but it has real drawbacks for bloggers: you’re working from templates that thousands of other people use, it takes real time to customize, and the free plan limits what you can export at full resolution.

    The smarter approach for high-volume bloggers in 2025 is an AI-first workflow:

    1. Write your blog post (or at least the title and intro)
    2. Go to pop-cam.com/free-tools/blog-header-image
    3. Paste your post title or a 1-sentence description
    4. Download the generated header (1200×628px, no watermark)
    5. Upload directly to WordPress as your featured image

    Total added time to your publishing workflow: under 60 seconds. Your blog looks more professional. Your images are unique. And you paid exactly $0.

    SEO Benefits of Using Unique AI-Generated Blog Images

    SEO benefits of unique blog images for Google Image Search

    Here’s something most bloggers overlook: Google Image Search is a meaningful traffic source, and it heavily favors original images over stock photos that appear across hundreds of thousands of sites.

    When you use a unique AI-generated image from Pop-Cam:

    • Google has only one place to index that image — your blog
    • Your article stands out in Google’s visual search results
    • Rich results and featured snippets are more likely to show your image
    • Social sharing generates unique preview cards instead of the same stock photo everyone recognizes

    Pro tip: Always add descriptive alt text to your AI-generated header (e.g., “AI illustration of a blogger creating content on a laptop”) — this gives Google additional context for both image search and regular web search rankings.

    Frequently Asked Questions

    Is this blog header image generator really free with no sign up?

    Yes. Pop-Cam’s Blog Header Image Generator is completely free — no account, no email, no credit card required. Just visit the page, describe your post, and download your image.

    Are there watermarks on the generated images?

    No watermarks. The images you generate are yours to use freely — on your blog, newsletter, social media, or anywhere else.

    What size are the blog header images?

    Images are generated at 1200×628px — the standard Open Graph image size and the ideal blog header/featured image size for WordPress, Ghost, Webflow, and most other platforms.

    Can I use these images commercially?

    Yes. AI-generated images from Pop-Cam can be used on commercial blogs, business websites, paid newsletters, and client work.

    How is this different from Canva’s free blog banner maker?

    Canva uses pre-made templates that thousands of other blogs use — so your header will look like a Canva template. Pop-Cam generates a completely unique AI illustration for your specific blog post topic, every single time. No templates. No duplicates.

    Does it work for WordPress featured images?

    Yes — the 1200×628px format works perfectly as a WordPress featured image, Open Graph card, and blog post header all at once.

    What if I need a blog header image in a different style?

    Pop-Cam’s full suite of AI image tools gives you more style options. The free blog header generator uses the Nano Banana illustration style — clean, bold, and universally readable. For photo-to-illustration conversion, check out Pop-Cam’s main image generator.

    Start Creating Free Blog Headers Today

    Every blog post deserves a header that’s unique, professional, and actually represents your content — not a recycled stock photo from 2019. With Pop-Cam’s free generator, you get all of that in under 30 seconds, with zero design skills, zero cost, and zero watermarks.

    No account. No watermark. No Canva needed.

  • Pop-Cam OpenClaw Skill: Generate Nano Banana AI Images Directly from Your AI Agent

    Pop-Cam OpenClaw Skill: Generate Nano Banana AI Images Directly from Your AI Agent

    If you’re already using Pop-Cam to turn photos into stunning Nano Banana AI illustrations, there’s now an even faster way to use it — directly from your OpenClaw AI agent, without switching apps or copy-pasting image URLs.

    Pop-Cam has released an official OpenClaw skill that connects your AI agent to the Pop-Cam Nano Banana image generation API. Install it once, and you can generate AI-illustrated images from a simple chat command.

    What Is the Pop-Cam OpenClaw Skill?

    OpenClaw is a personal AI agent platform that runs on your own machine. It supports Skills — small instruction sets that give your agent new abilities, like sending emails, reading calendars, or (now) generating images.

    The pop-cam-api skill connects OpenClaw directly to Pop-Cam’s REST API endpoint (/api/v1/nanobanana). Once installed, you can tell your agent: “Turn this photo into a Nano Banana illustration” — and it handles everything: encoding the image, calling the API, and returning a ready-to-use image URL.

    Why Use Pop-Cam Via OpenClaw?

    • No context switching — Stay in your agent chat and generate images inline with other tasks
    • Automatable — Trigger image generation as part of a larger workflow (e.g., “generate a cover image for today’s blog post”)
    • Webhook support — For high-volume use, async generation with webhook callbacks keeps things fast
    • Combine with other skills — Pair with the WordPress Publisher skill to auto-generate + publish illustrated blog headers

    How to Install the Pop-Cam Skill in OpenClaw

    The skill is available on ClawHub — OpenClaw’s public skill registry with 3,000+ community skills. Installing takes one command:

    clawhub install pop-cam-api

    Or search for it first:

    clawhub search "image generation"

    After install, you’ll need a Pop-Cam API token (pk_...). Get one from pop-cam.com/developer and save it to your workspace:

    POPCAM_API_KEY=pk_your_token_here

    What Happens Under the Hood

    The skill uses Pop-Cam’s Nano Banana image generation API, which is powered by Google’s Nano Banana Pro model — the same model behind Google’s AI image features in Gemini and Search. Pop-Cam wraps this into a simple REST API with:

    • Base64 image input (any common format: JPEG, PNG, WebP)
    • Optional custom prompt to guide the illustration style
    • Permanent hosted output URL on R2 storage
    • Credit-based billing (1 generation = 1 credit)

    OpenClaw’s skill layer handles encoding, error codes (401 invalid token, 402 insufficient credits), and result delivery — so your agent just gets back an image URL it can use immediately.

    Real-World Use Cases

    • Content creators: Generate illustrated headers for blog posts, newsletters, or social media on demand
    • Developers building agents: Add image generation to any OpenClaw workflow without writing custom API code
    • E-commerce teams: Transform product photos into branded illustrations at scale
    • Indie hackers: Prototype visual AI apps using Pop-Cam as the image backend, OpenClaw as the orchestration layer

    Nano Banana 2 vs. Nano Banana Pro — Which Does Pop-Cam Use?

    Pop-Cam currently uses Nano Banana Pro for its API — Google’s more capable image model that supports conversational editing, multi-image blending, accurate text rendering, and Google Search grounding for factual content. This is the same model powering premium image generation in Google AI Pro/Ultra.

    Google has since released Nano Banana 2 as the next generation. Pop-Cam is tracking these releases closely — expect API updates as new models roll out.

    Target Keywords This Feature Addresses

    If you’ve been searching for any of these, the Pop-Cam OpenClaw skill is what you’re looking for:

    • OpenClaw image generation skill
    • Nano Banana API OpenClaw integration
    • AI agent image generation ClawHub
    • Pop-Cam API tutorial
    • OpenClaw Nano Banana Pro skill install
    • Generate images from AI agent chat

    Get Started

    The combination of Pop-Cam’s Nano Banana API and OpenClaw’s skill system is one of the fastest ways to add production-quality AI image generation to any agent workflow — no custom code, no boilerplate, just a skill install and a chat command.

  • 5 Ways AI is Transforming Photo Editing in 2026

    5 Ways AI is Transforming Photo Editing in 2026

    Artificial intelligence has revolutionized the way we edit and transform photos. From automatic background removal to turning snapshots into stunning infographics, AI-powered tools like Pop-cam are making professional-quality image editing accessible to everyone.

    1. Instant Photo-to-Infographic Conversion

    Gone are the days of spending hours in design software. With AI, you can now upload a photo and have it transformed into a polished infographic in seconds. Pop-cam uses advanced models like GPT-image-1 and Flux Kontext Pro to generate cartoonish, eye-catching visuals from any image.

    2. One-Click Background Removal

    AI background removal has become incredibly accurate. What used to require careful manual masking can now be done with a single click, producing clean transparent backgrounds perfect for product photos, social media, and presentations.

    3. Style Transfer and Cartoon Effects

    Want to turn a selfie into a cartoon or apply the style of a famous painting? AI style transfer models can now do this in real-time, preserving the essence of your original photo while applying dramatic artistic transformations.

    4. Smart Text-to-Image Generation

    Describe what you want, and AI will create it. Text-to-image models have matured to the point where they can generate photorealistic or stylized images from simple text prompts, opening up endless creative possibilities.

    5. Automated Image Enhancement

    AI can now automatically adjust lighting, color balance, sharpness, and composition to make any photo look its best. These enhancements are contextually aware, meaning the AI understands what type of photo it is working with and applies appropriate corrections.

    Try It Yourself

    Ready to see AI photo transformation in action? Try Pop-cam and turn your photos into amazing infographics and cartoons with just a few clicks.