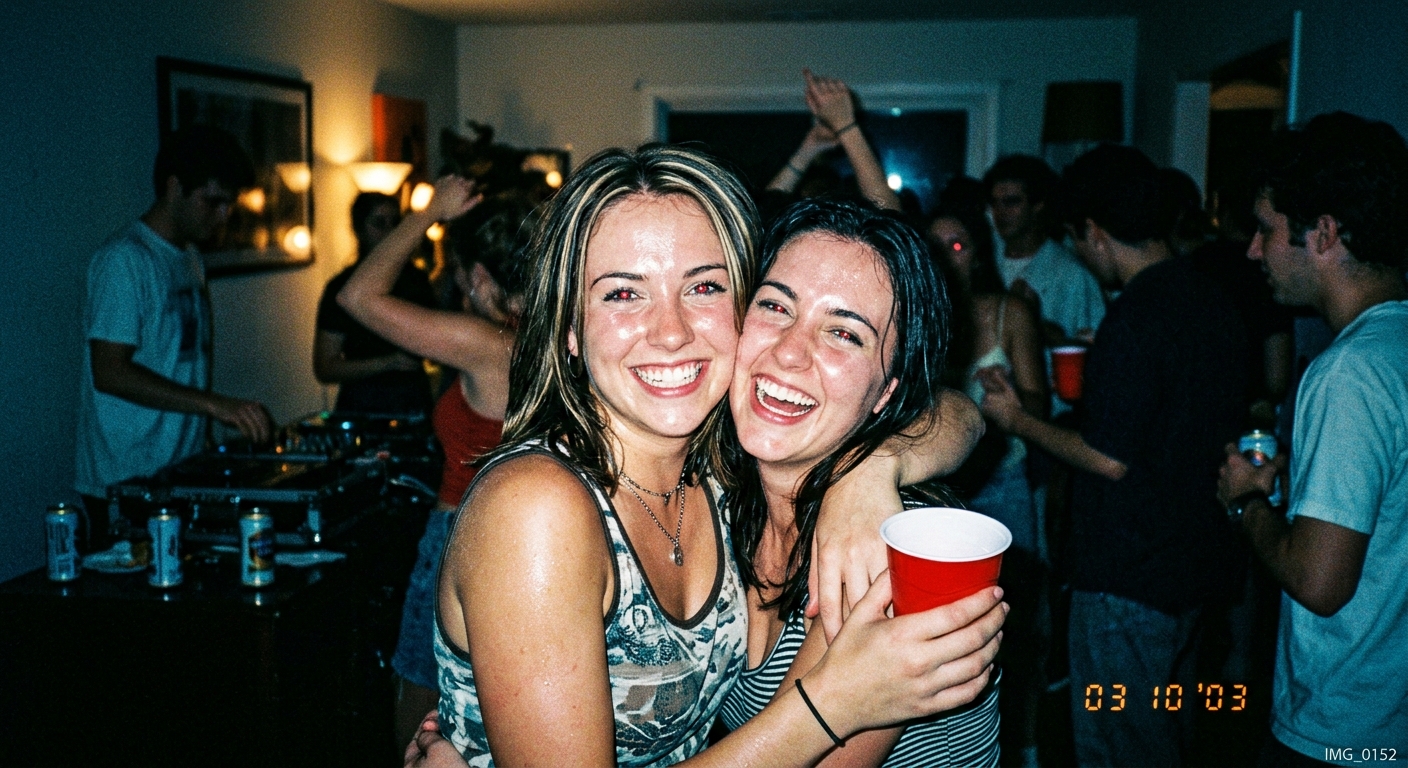
The Y2K camera aesthetic isn’t random. It’s not just a filter slapped on a modern photo.
It’s the result of specific technical settings that early digital cameras (1998-2005) used — settings that created that distinct overblown flash, cool-toned, high-contrast look we now call “nostalgic.”
If you want to recreate authentic Y2K vibes, you need to understand the settings behind the aesthetic.
Whether you’re using a vintage digital camera, a modern AI tool, or a mobile app, the principles are the same: harsh flash, cool color temperature, high contrast, visible grain, and low resolution.
Let’s break down the exact settings you need.
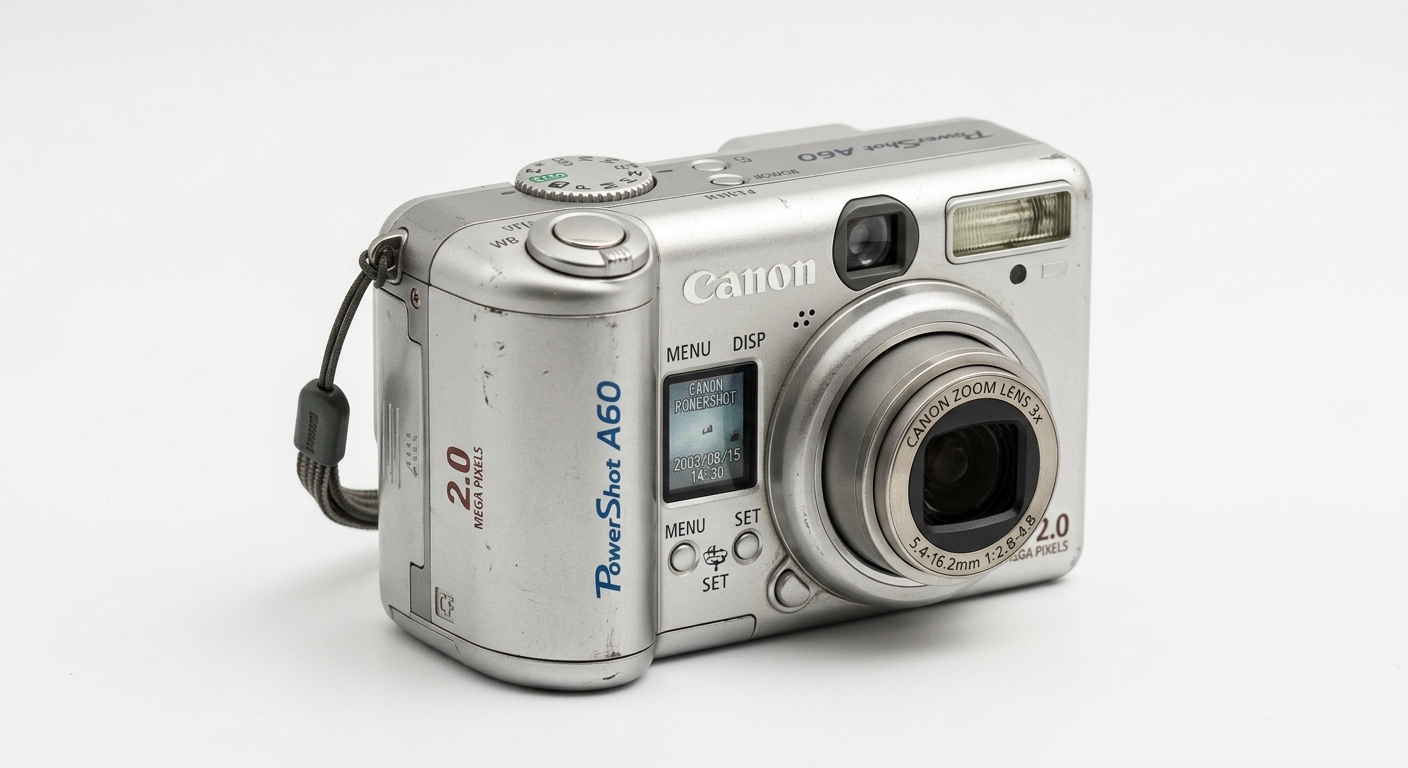
Key Y2K Camera Settings (The 6 Essentials)
Here are the core technical parameters that define the Y2K camera aesthetic:
1. Flash: Overblown & Direct
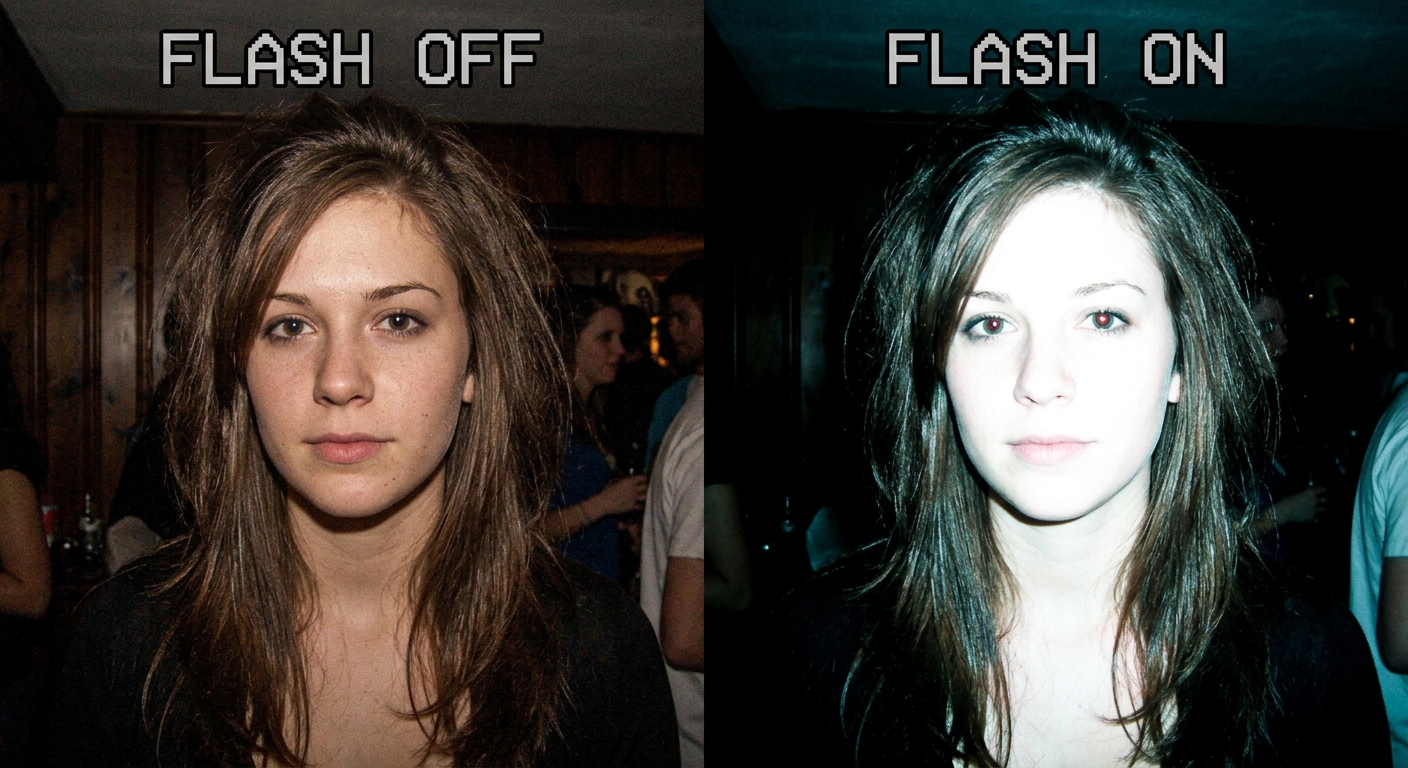
Early digital cameras had weak, on-camera flashes that fired at full power. The result? Blown-out faces, dark backgrounds, harsh shadows.
Setting:
• Flash mode: Always ON (forced flash)
• Flash power: 100% (no adjustment available on most Y2K cameras)
• Flash distance: Close range (3-10 feet optimal)
Why it matters: The overblown flash is the most recognizable Y2K trait. Without it, you just have a regular digital photo.
2. ISO: Low (100-200)
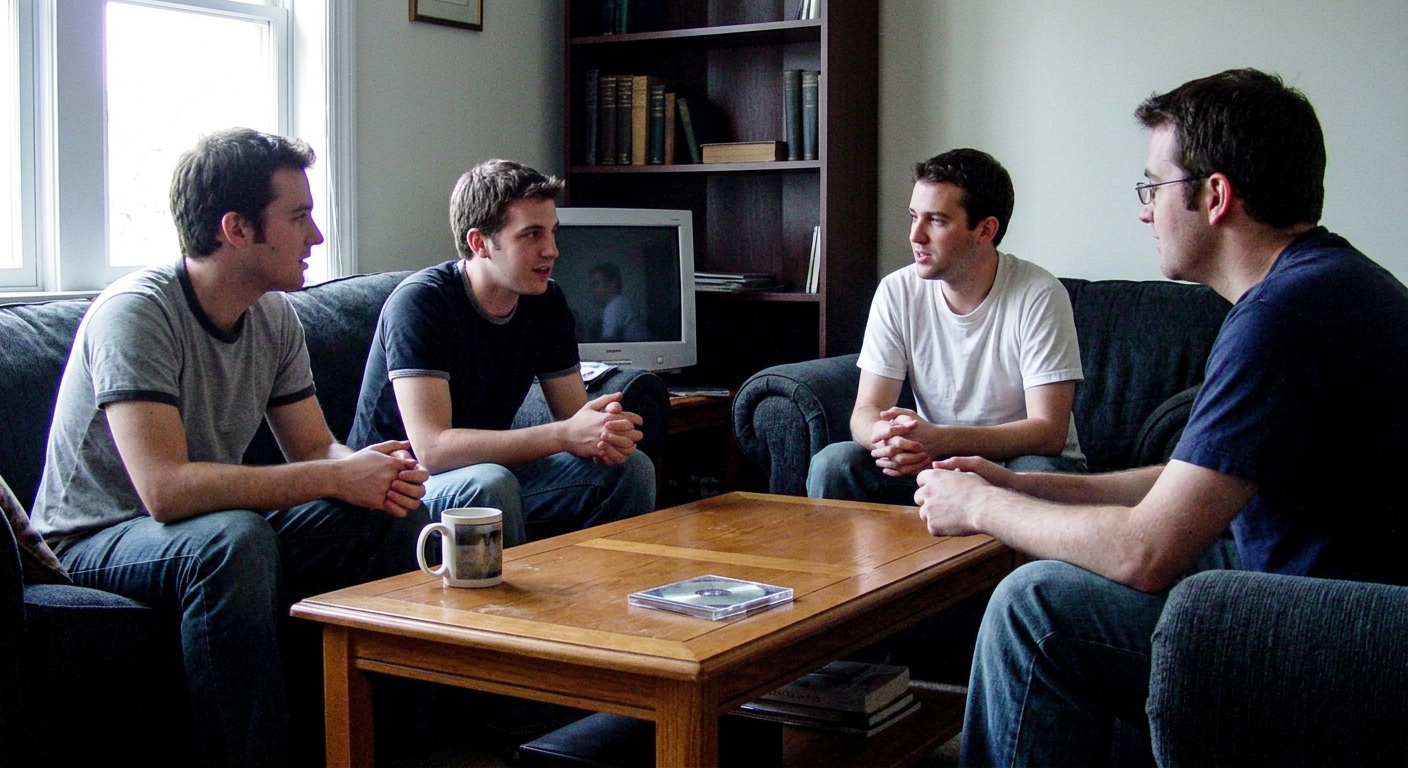
Y2K cameras had poor high-ISO performance. To avoid excessive noise, they defaulted to ISO 100-200 and compensated with flash.
Setting:
• ISO: 100-200 (auto mode often locked here)
• Result: Clean highlights, visible grain in shadows
Why it matters: Low ISO + flash creates that signature Y2K contrast — glowing faces, noisy backgrounds.
3. White Balance: Cool (Auto or Fluorescent)
Auto white balance on early cameras often skewed blue-green, especially under indoor fluorescent lighting.
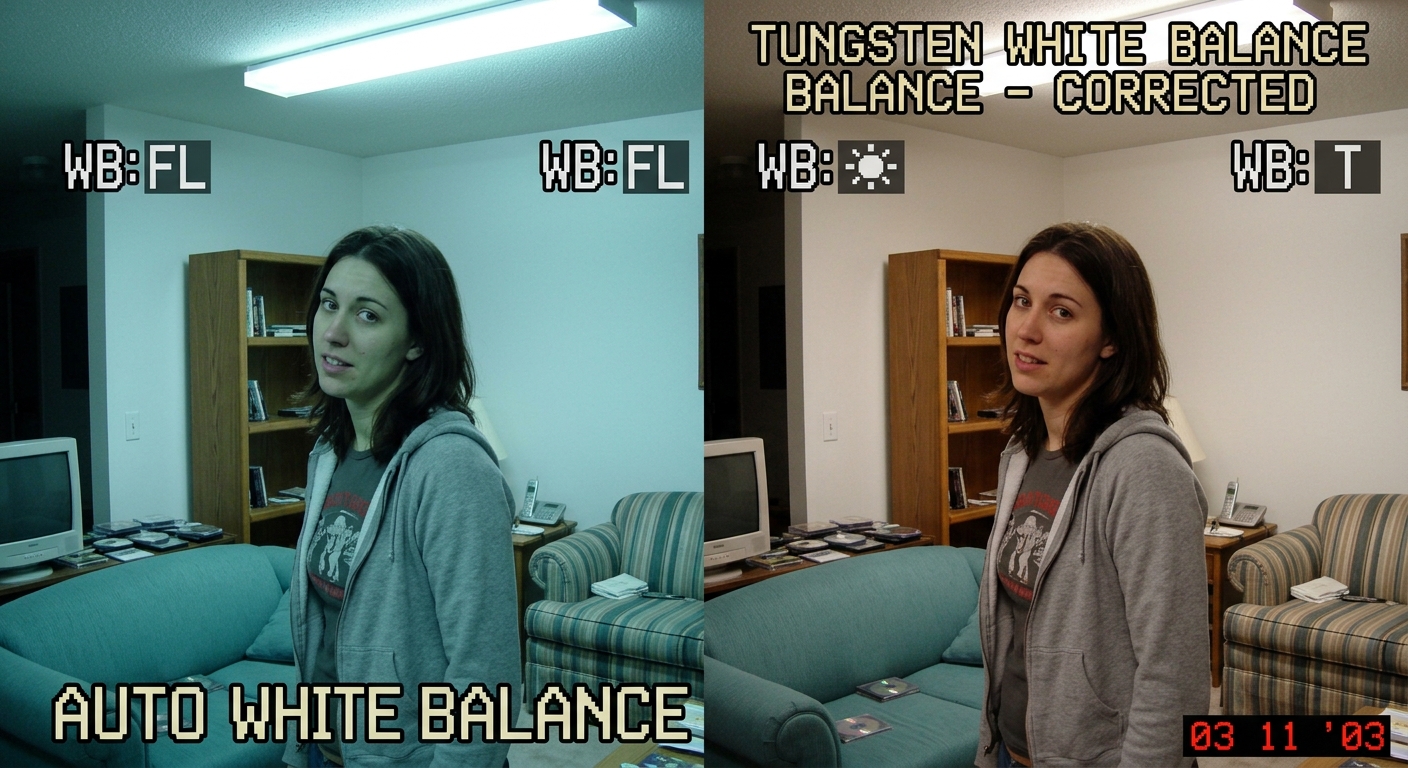
Setting:
• White balance: Auto (tends cool) or Fluorescent preset
• Color temperature: 5000K-6500K (cool, not warm)
Why it matters: The cool blue-green tint separates Y2K from warmer CCD or film aesthetics. Learn more: Y2K vs CCD camera.
4. Contrast: High
To compensate for small sensors, manufacturers cranked up in-camera contrast processing.
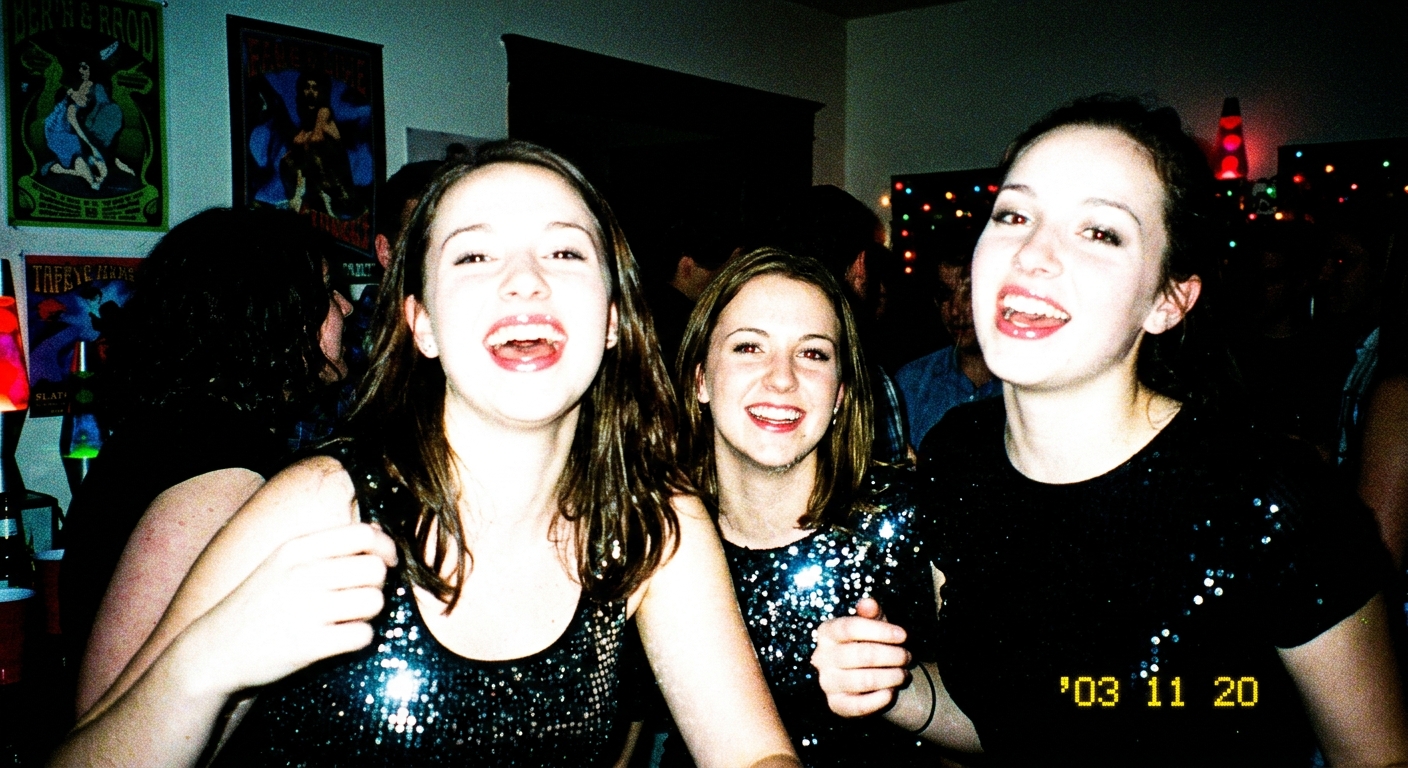
Setting:
• Contrast: +1 to +2 (or “Vivid” picture mode)
• Result: Deep blacks, bright whites, minimal mid-tones
Why it matters: High contrast = punchy, dramatic photos. It’s part of the Y2K “energy.”
5. Saturation: High (Especially Reds & Blues)
Y2K cameras boosted saturation to make colors “pop” — but it looked unnatural.
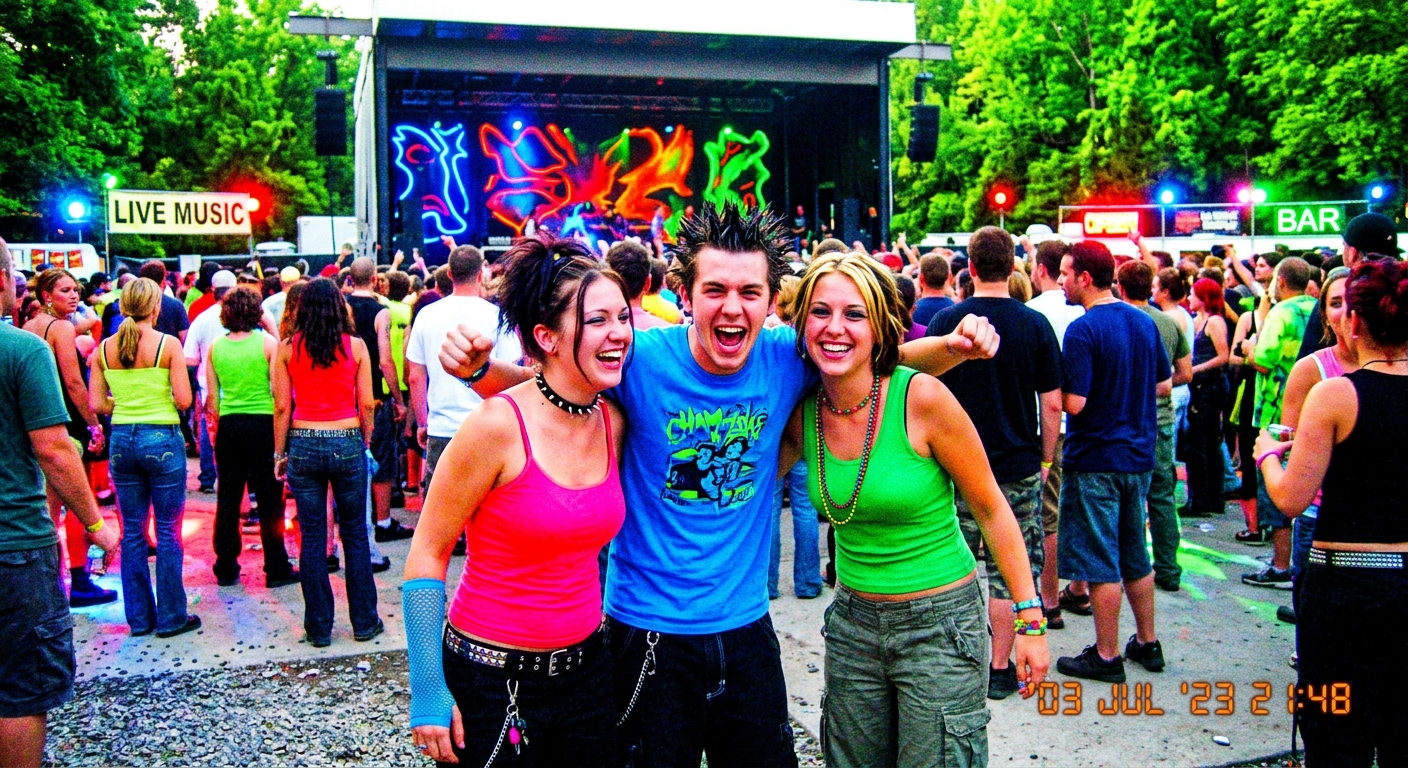
Setting:
• Saturation: +1 to +2 (or “Vivid” mode)
• Result: Electric blues, neon reds, oversaturated greens
Why it matters: Natural colors = modern. Oversaturated colors = Y2K.
6. Resolution: Low (3-5 Megapixels)
Early digital cameras maxed out at 3-5MP. Images were soft, slightly pixelated, with blurred edges.
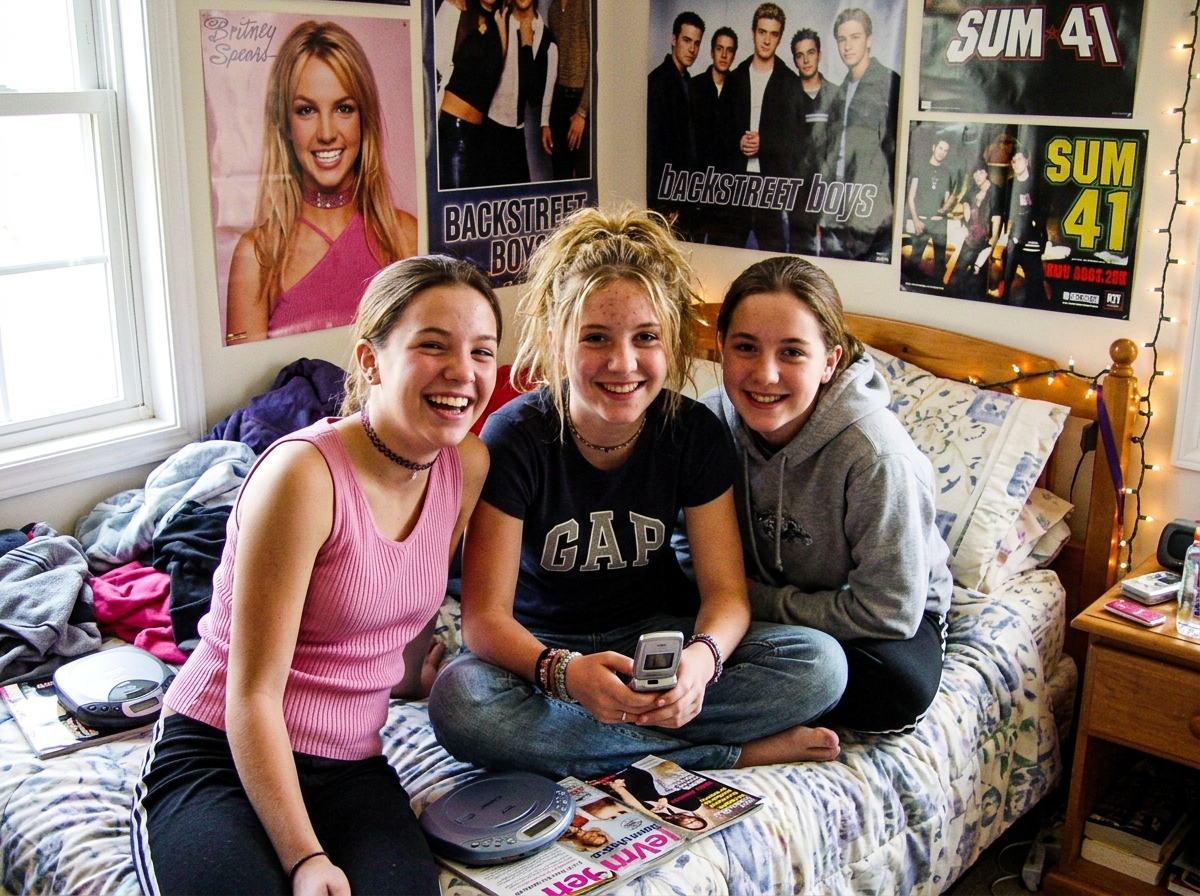
Setting:
• Resolution: 1600×1200 to 2560×1920 (3-5MP)
• Result: Soft focus, no fine detail
Why it matters: Modern high-res photos look too crisp. Y2K photos had a soft, “digital camera” quality.
Step-by-Step: How to Apply Y2K Settings
Option 1: Using a Vintage Digital Camera
If you have a real Canon PowerShot, Sony Cyber-shot, or Nikon Coolpix:
- Turn on forced flash (disable auto/red-eye modes)
- Set ISO to 100-200 (or leave on Auto)
- Select “Vivid” or “Standard” picture mode (avoid “Portrait” or “Landscape”)
- Set white balance to Auto or Fluorescent
- Shoot in JPEG (not RAW — Y2K cameras didn’t have RAW)
- Get close (3-10 feet from subject for optimal flash coverage)
Pros: 100% authentic hardware experience
Cons: Expensive, fragile, low resolution, no editing flexibility
Option 2: Using AI Tools (Recommended)
Modern AI tools like PopCam let you simulate Y2K settings digitally:
- Upload your photo (any resolution, any device)
- Choose a Y2K preset (e.g., “Flashy Lavender Stars” or “Polka Dot Shoe Phone”)
- Adjust flash intensity (subtle → nuclear blast)
- Set color temperature (cool blue-green)
- Increase contrast & saturation
- Add visible grain (adjust noise level)
- Optional: Add date/time stamp (orange or white, bottom-right corner)
- Download in high resolution
Pros: Full control, high-res output, no vintage gear needed
Cons: Not “true” hardware (but 95%+ indistinguishable)
Learn more: How to get the Y2K look without buying a camera
Option 3: Using Mobile Apps
Apps like Huji Cam, Dazz Cam, 1998 Cam:
- Open app and grant camera access
- Select Y2K or “Digital Camera” filter
- Shoot with flash enabled
- App auto-applies settings (limited customization)
- Export (often compressed or watermarked)
Pros: Easy, quick
Cons: Generic filters, low output quality, no fine-tuning
Y2K Camera Settings for Different Scenarios
Not all Y2K photos need the same settings. Here’s how to adjust based on lighting:
Scenario 1: Party / Nightlife (Classic Y2K)
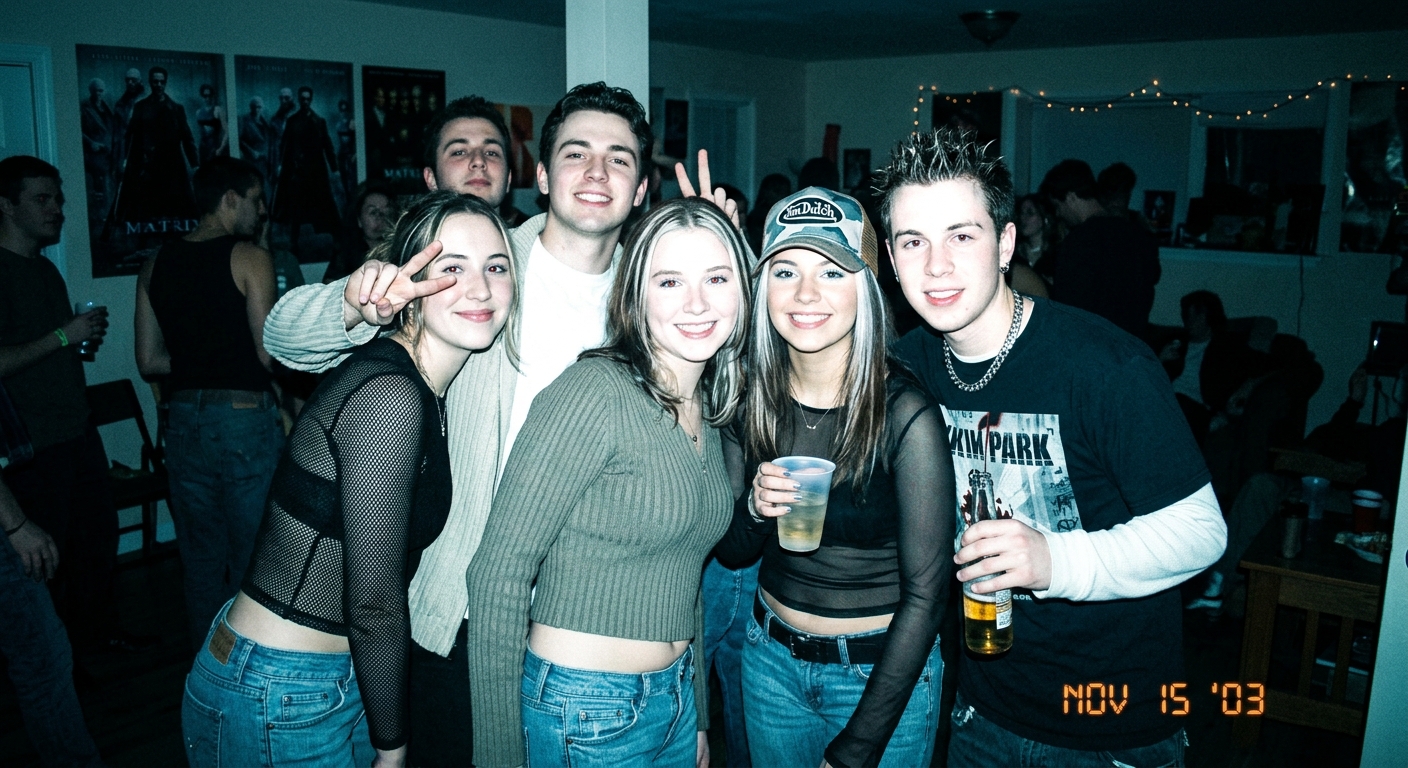
Settings:
- Flash: 100% (full blast)
- ISO: 200-400
- White Balance: Auto (cool)
- Contrast: High (+2)
- Saturation: High (+2)
Result: Glowing faces, dark backgrounds, electric colors — the iconic Y2K party vibe.
Scenario 2: Indoor / Fluorescent Lighting
Settings:
- Flash: 80% (medium)
- ISO: 100-200
- White Balance: Fluorescent (extra blue-green tint)
- Contrast: Medium (+1)
- Saturation: Medium (+1)
Result: Cool-toned, slightly sterile look — common in Y2K indoor shots (malls, offices, schools).
Scenario 3: Outdoor / Daylight
Settings:
- Flash: OFF or 30% (fill flash only)
- ISO: 100
- White Balance: Auto or Daylight
- Contrast: High (+2)
- Saturation: High (+2)
Result: Bright, oversaturated colors, minimal shadows. Think early-2000s vacation photos.
Scenario 4: Golden Hour (Hybrid Y2K/CCD Vibe)
Settings:
- Flash: OFF
- ISO: 100-200
- White Balance: Auto (slightly warm)
- Contrast: Medium (+1)
- Saturation: Medium (+1)
Result: Less harsh than classic Y2K, warmer tones, closer to CCD aesthetic.
Common Mistakes to Avoid
1. Overdoing the Grain
Y2K photos have visible grain in shadows, not thick film-like grain everywhere.
Fix: Keep grain subtle in highlights, visible in dark areas only.
2. Using Warm Color Temperature
Y2K = cool blue-green tones. Warm yellow tones = CCD or film aesthetic.
Fix: Shift white balance cooler (5500K-6500K).
3. Soft Flash or No Flash
Without harsh, overblown flash, it’s not Y2K — it’s just a digital photo.
Fix: Crank flash intensity to maximum.
4. Too High Resolution
Modern 12MP+ photos look too sharp. Y2K cameras were 3-5MP max.
Fix: Downscale to 1600×1200 or 2560×1920 for authentic softness.
5. Wrong Date Stamp Placement
Y2K cameras stamped dates in the bottom-right corner (or bottom-left), not center.
Fix: Place timestamp in corner, orange or white font, small size.
How to Fine-Tune Y2K Settings
Once you have the base settings, here’s how to dial in the perfect vibe:
Adjust Flash Intensity by Distance
- Close-up (0-3 feet): Reduce flash to 70-80% (avoid total blowout)
- Mid-range (3-10 feet): Use 100% flash (optimal Y2K range)
- Far (10+ feet): Flash won’t reach — switch to CCD or film aesthetic
Match Grain to ISO
- ISO 100: Minimal grain, clean highlights
- ISO 200: Slight grain in shadows
- ISO 400+: Heavy grain (only if shooting indoors without flash)
Test Different Presets
If using AI tools like PopCam, try multiple Y2K presets:
- “Flashy Lavender Stars”: Cool-toned, high flash, party energy
- “Polka Dot Shoe Phone”: Warm flash, nostalgic texture
- “Cat Print Digital Camera”: Soft grain, subtle timestamp
- “Ocean Denim Corset”: Blue-green cast, classic Y2K color science
Each preset mimics a different Y2K camera model.
Real-World Y2K Settings Example
Let’s say you’re recreating a 2003 house party photo:
Camera settings (vintage camera):
- Canon PowerShot S200
- Flash: ON (forced)
- ISO: 200
- White Balance: Auto (fluorescent lighting → blue-green tint)
- Picture Mode: Vivid
- Resolution: 1600×1200 (2MP)
AI tool settings (PopCam):
- Preset: “Flashy Lavender Stars”
- Flash intensity: 95%
- Color temperature: 5800K (cool)
- Contrast: +2
- Saturation: +2
- Grain: 30% (visible in shadows)
- Date stamp: “2003:08:15 23:47” (orange, bottom-right)
Result: Glowing faces, dark background, electric blue-green tint, punchy reds, visible grain — pure Y2K nostalgia.
FAQs
What’s the most important Y2K camera setting?
Flash. Without overblown, harsh flash, you don’t have Y2K — you just have a regular digital photo. Flash is non-negotiable.
Can I get Y2K vibes without flash?
Technically yes, but it won’t be “classic Y2K.” You can use high contrast + cool tones + grain for a Y2K-adjacent look, but it’s closer to CCD aesthetic.
What ISO should I use for Y2K photos?
ISO 100-200 is ideal. Y2K cameras had poor high-ISO performance, so they stuck to low ISO and compensated with flash.
Should I shoot in RAW or JPEG?
JPEG. Y2K cameras didn’t support RAW. Shooting JPEG with in-camera processing (high contrast, high saturation) is more authentic.
How do I add a date stamp like old cameras?
Use AI tools like PopCam or mobile apps (Huji Cam, Dazz Cam). Position it in the bottom-right corner, use orange or white font, and keep it small.
Final Thoughts
Y2K camera settings aren’t complicated — they’re just intentionally harsh:
- Overblown flash (100% power)
- Cool white balance (blue-green tint)
- High contrast & saturation (punchy, unnatural colors)
- Low ISO (100-200)
- Low resolution (3-5MP)
- Visible grain (in shadows only)
Master these settings, and you’ll capture authentic Y2K nostalgia — whether you’re using vintage hardware, AI tools, or mobile apps.
Dial in the perfect Y2K settings in seconds.
Leave a Reply